# What is Send With SES ?

{% hint style="info" %}
**Send With SES has been rebranded as SENDUNE. The latest documentation is here:** [<mark style="color:red;">**https://docs.sendune.com/**</mark>](https://docs.sendune.com/)
{% endhint %}

**Send With SES** is a '**Customer Data'**, '**Customer Communication'** and '**Customer Support'** platform. Together, they make it really easy to understand your customer behaviour and send them targeted messages (emails, sms, push notifications, support tickets).

{% tabs %}
{% tab title="Customer Data" %}
Customers are the users of your app/website. You uniquely identify your customers either with their email id or their mobile number. You can stored unlimited contacts.&#x20;

Your customers perform a series of actions when they are browsing through your website or mobile app - like logging in, adding an item to cart, making a purchase, sharing a link, leaving a review, logging out, etc.&#x20;

Each action is '**metadata**' that indicates some customer behaviour.&#x20;

You attach all this metadata to individual customers using the 'Send With SES Contacts API'. For example, if a customer adds 'red sneakers' to their wish-list, you attach the '**tag**' \[*red sneakers*] to that particular customer.

You can attach as much metadata as required to each customer.
{% endtab %}

{% tab title="Customer Communication" %}
You can filter your contacts using the metadata (tags) to generate your own '**intelligence**' and send targeted messages - manually or via the API or through set rules (automations).&#x20;

Messages can be Emails, SMS, Chat Messages, Push Notifications or a combination thereof.

Send With SES integrates with your own AWS account to send Emails, SMS, and Push Notifications to your customers at low cost while ensuring high deliverability.
{% endtab %}

{% tab title="Customer Support" %}
Customer support is through a '**Unified Inbox**' that holds messages arriving from customers via Email.

When your customer sends you an email, it lands in a 'unified inbox' that is shared by one or more members of your customer support team. Anyone can reply to the message and everyone can see the conversation thread to get full contextual clarity about that support request.
{% endtab %}
{% endtabs %}

<figure><img src="https://1895149818-files.gitbook.io/~/files/v0/b/gitbook-x-prod.appspot.com/o/spaces%2F-LUFI_-_gHZ4pIVzoRlq%2Fuploads%2FMRfmxkhucxFK9UjXZFHa%2FGroup%201.png?alt=media&amp;token=6b32b71a-f1cc-4d04-ad19-816ae53f9789" alt="" width="375"><figcaption><p>A perfect union.</p></figcaption></figure>


# Why Send With SES ?

{% hint style="info" %}
**Send With SES has been rebranded as SENDUNE. The latest documentation is here:** [<mark style="color:red;">**https://docs.sendune.com/**</mark>](https://docs.sendune.com/)
{% endhint %}

**Send With SES** makes it easy to understand your customer behaviour and communicate with them.

Specifically, Send With SES helps you achieve three core things.

1. Log and analyse all your customer browsing data - in fact log any data points that can help you better understand your users. This is done using the 'Contacts API'.
2. Send relevant messages via Email, SMS, and Push Notifications.&#x20;
3. Support your customers with the Team Inbox.&#x20;

As you can see, Send With SES revolves around your customer. When you understand your customers better it directly translates to quicker and better profitability.

There are lots of products out in the interwebs that propose to do some or all of the above. These products go by different names - CRM, Customer Data Platform, Customer Engagement, Omni Channel Messaging, Journeys, Flows .... and so on and on. When you strip out all the marketing fluff, the core of everything comes to '*understanding customer behaviour and communicating with them*'.

Send With SES focuses on this core. Send With SES achieves everything you would expect from any reputed service provider in the same segment - minus the high cost and high complexity.

Send With SES focuses on speed, simplicity, and ease of use. Our team has built systems that handle billions of data points every day with four nines (99.99) availability. We applied much of that learning to Send With SES. Send With SES is designed to scale massively and be highly available at the same time. Send With SES should be your choice if you crave speed, simplicity, ease of use.

Send With SES comes with a generous free plan.&#x20;

Sign up if you are convinced.


# Get Started

{% hint style="info" %}
**Send With SES has been rebranded as SENDUNE. The latest documentation is here:** [<mark style="color:red;">**https://docs.sendune.com/**</mark>](https://docs.sendune.com/)
{% endhint %}

You need the following to get started with Send With SES.

1. **An AWS Account** - Emails and SMS are sent from this account.
2. **An AWS IAM Role** - This allows Send With SES to programmatically connect to your AWS account.
3. **Move out of SES Sandbox** - Raising an AWS support request to allow you to send Emails.
4. **Move out of SMS Sandbox** - Raising an AWS support request to allow you to send SMS. &#x20;
5. **A Send With SES Account** (obviously) - To store and manage all your customer data.

If you are an AWS developer these steps should be very easy for you. If not, the whole process can take 20-30 minutes. If you do not have the time, you can stop here. If you do have the patience, Send With SES offers you everything you would expect from any reputed service provider in the same segment - minus the high cost and complexity.

Lets go through each step one by one.

### 1. Create AWS Account.

Creating an AWS account is just like creating an new email account. It's free and should take just a few minutes. Click this [<mark style="color:red;">link</mark>](https://portal.aws.amazon.com/billing/signup#/start/email) to start the process. You will be asked to provide a credit card. Do not worry. AWS will not bill you until you exceed their generous [<mark style="color:red;">free tier</mark>](https://aws.amazon.com/free).

### 2. Create AWS IAM Role.

An IAM Role allows Send With SES to programmatically connect to your AWS account to perform various actions like sending emails and sms. Please note that as of now Send With SES requires the 'IAMFULLACCESS' Role. Here's [<mark style="color:red;">why</mark>](https://docs.sendwithses.com/getting-started#must-read-why-we-ask-for-iam-full-access-role). Creating a role takes a minute or two. See the below video (upto 1:10 timestamp) for instructions.

{% embed url="<https://vimeo.com/796650250>" %}

### 3. Move out of SES Sandbox.

To prevent abuse AWS puts new accounts in '[<mark style="color:red;">Sandbox Mode</mark>](https://docs.aws.amazon.com/ses/latest/DeveloperGuide/request-production-access.html)' with certain restrictions. You need to answer a few questions explaining your use case to move out of the sandbox.&#x20;

**IMPORTANT**: AWS has datacenters in many regions. Send With SES currently supports the below three regions only.&#x20;

1. US East (N. Virginia)&#x20;
2. US West (Oregon)&#x20;
3. EU (Ireland)

Select any one of these regions from the top-right dropdown in your AWS SES dashboard and then click 'Request production access'. See the below video for full instructions.

{% embed url="<https://vimeo.com/796619175>" %}

AWS usually grants you access within a few hours. They might however ask you for additional details before granting you access. Do not worry if they grant you lesser sending limits than what you asked. You can always raise a new support request.

### 4. Move out of SMS Sandbox.

{% hint style="info" %}
This step is required only if you want to send SMS (Text Messages) and OTP's.
{% endhint %}

To move out of the SMS Sandbox follow the instructions detailed [<mark style="color:red;">here</mark>](https://docs.aws.amazon.com/pinpoint/latest/userguide/channels-sms-awssupport-sandbox.html).&#x20;

**IMPORTANT:** Make sure the AWS region is the same as the one you selected when moving out of SES Sandbox.

You can send SMS to almost [<mark style="color:red;">all countries</mark>](https://docs.aws.amazon.com/pinpoint/latest/userguide/channels-sms-countries.html) across the world. Some countries have additional requirements to send SMS.

* Additional requirements for [<mark style="color:red;">sending SMS to USA</mark>](https://docs.aws.amazon.com/pinpoint/latest/userguide/settings-10dlc.html).
* Additional requirements for [<mark style="color:red;">sending SMS to INDIA</mark>](https://docs.aws.amazon.com/pinpoint/latest/userguide/channels-sms-senderid-india.html).

For new accounts the monthly SMS spend limit is restricted to  $1.00 (USD). Estimate your SMS sending cost and increase your monthly SMS spending quota by following instructions [<mark style="color:red;">here</mark>](https://docs.aws.amazon.com/pinpoint/latest/userguide/channels-sms-awssupport-spend-threshold.html).

Once AWS grants you your SMS spending limit increase, you will need to input that value in Send With SES (see below image).

<figure><img src="https://1895149818-files.gitbook.io/~/files/v0/b/gitbook-legacy-files/o/assets%2F-LUFI_-_gHZ4pIVzoRlq%2F-M0aIiJhzPtSnpPUHCnX%2F-M0acDCmgNxp36O8DYbP%2F6%20SMS.png?alt=media&amp;token=e5370138-91cb-44ff-98a6-554a679178db" alt=""><figcaption></figcaption></figure>

### 5. Create Send With SES Account.

Now that you have completed the above steps, it's time to get your Send With SES account up and running. [<mark style="color:red;">Sign up</mark>](https://app.sendwithses.com/) for an free account if you haven't already done so. Once you login you are automatically taken to the settings page. It looks like below.

<figure><img src="https://1895149818-files.gitbook.io/~/files/v0/b/gitbook-x-prod.appspot.com/o/spaces%2F-LUFI_-_gHZ4pIVzoRlq%2Fuploads%2F4pknNG4u7GSHYE6Ghw5f%2Fsendwithses%20settings%20process%20documentation.png?alt=media&amp;token=2cf040e3-8a32-4717-8da5-8014c7d3e301" alt=""><figcaption></figcaption></figure>

Details for each step.

1. **Select Primary Key for Contacts:** The 'Primary Key' is the way you uniquely identify your users. This is usually the Email ID or Mobile Number with which they login to your app or website. Choose one accordingly. **This cannot be changed once set**.
2. **Select AWS Region:** Remember the AWS region you selected in steps 3 and 4 above? Select the same one here.
3. **Enter IAM Role ARN:** This is the one you created in step 2 above. Copy-paste it here and verify it.
4. **Enter Domain To be Verified:** This is the domain from which you will be sending your emails. You need to have a domain. Otherwise your emails will land up in spam folders. You can use a domain (example.com) or a sub domain here (emails.example.com).
5. **Enter DNS Records:** Once you enter your domain, you will be shown a set of DNS records. You will need to enter these DNS records with your domain registrar (i.e. the place where you purchased your domain from). It can take a few minutes to a few hours before your DNS records will be verified. Once verified, you are all set to start using Send With SES &#x20;

For step 5, you might want to watch the below video from the [<mark style="color:red;">1:05</mark>](https://vimeo.com/796650250#t=1m5s) timestamp.

{% embed url="<https://vimeo.com/796650250#t=1m5s>" %}

These setups are a one time process. Once done, you can enjoy the benefits of a low cost, highly reliable email/sms service for as long as you wish.

***

{% hint style="danger" %}

### **MUST READ: Why we ask for "IAM Full Access" Role ?**

In the early days of Send With SES, we asked full access permission only for SES and SNS. Send With SES is in a constant state of development. As we kept building the product we wanted permissions for S3 to store email images and SQS to queue email delivery notifications for further processing. Sometime later we wanted CloudWatch access to hold and process SMS related delivery notifications.

We also expected AWS to introduce breaking changes and wanted to be ready in such cases. Not surprisingly AWS sent everyone the following message a few months ago. (They later rolled backed on this requirement.)

*<mark style="color:red;">"We are reaching out to notify you that AWS Managed Policy is making a change that will require your action. AWS Managed Policy is deprecating the managed policy "CloudWatchFullAccess" and replacing it with "CloudWatchFullAccessV2". After December 7, 2023, "CloudWatchFullAccess" will no longer be supported."</mark>*

How do we provide an uninterrupted and seamless experience to end users when we have to constantly keep asking them to add specific permissions every now and then. This was not at all user friendly. Both end-user experience as well as product development suffered.

So we decided to ask only for one permission - IAM Full Access.

Some people were/are unhappy. Somehow their assumption was, "*If we give you IAM Full Access you will misuse it.*", or, "*Your servers will get hacked and those hackers will do something bad.*" Understandably, these are valid assumptions, like, "*Do not build a flying machine because it might crash.*"

We believe transparency and a proper explanation will convince some people and no amount of explanation will convince other people. To those people who are considering to use Send With SES, this is how we handle things.

1. Send With SES accesses your AWS Account by requesting a set of temporary keys using the 'IAM Role' provided by you. This is the recommended best practice by AWS. No third parties can access your account.
2. IAM Full Access is something similar to full admin access. It gives Send With SES the power to provision any resource within your AWS Account. However Send With SES only provisions resources which are required. Currently these are - SES, SQS, SNS, S3, Pinpoint, CloudWatch.
3. You can delete the IAM Role at any time to prevent Send With SES from accessing your AWS Account.
4. **It is highly recommended you create a separate AWS Account exclusively for Send With SES. This way you can be sure that any resource launched within this AWS Account has been provisioned by Send With SES.**

{% endhint %}

**--------------IGNORE BELOW STEPS - OUTDATED---------------**

**Send With SES** integrates with your own AWS account to send Transactional Emails and SMS's. We highly recommend you [create](https://portal.aws.amazon.com/billing/signup#/start/email) a separate AWS account for use exclusively with Send With SES.&#x20;

Proceed with the below steps once you have created your AWS account. The whole process can take upto 20 minutes. AWS might take upto 24 hours (usually much lesser) to move your account out of the SES sandbox.

1. Create AWS Role and add that role Role in Send With SES settings.
2. Add DNS Records for your Domain.
3. Move out of SES Sandbox (to send emails).&#x20;
4. Move out of SMS Sandbox (Optional. Only if you want to send SMS's). ([Instructions](https://docs.aws.amazon.com/pinpoint/latest/userguide/channels-sms-awssupport-sandbox.html)).

For 1, 2, 3, click the videos below for step-by-step guides.

{% embed url="<https://vimeo.com/796650250>" %}
When creating AWS Role, the 'Account ID' to be mentioned is **033267325636**
{% endembed %}

{% hint style="info" %}

### IMPORTANT:&#x20;

When creating AWS Role, the 'Account ID' to be mentioned is **033267325636**
{% endhint %}

{% embed url="<https://vimeo.com/796619175>" %}
When moving out of SES Sandbox, the region selected in AWS Dashboard must match the region selected in Send With SES Settings Dashboard.
{% endembed %}

{% hint style="info" %}

### IMPORTANT:

When moving out of SES Sandbox, the region selected in AWS Dashboard must match the region selected in Send With SES Settings Dashboard.
{% endhint %}


# Pricing

Send With SES is now SENDUNE (https\://sendune.com)

{% hint style="success" %}
**Send With SES is now** [**SENDUNE**](https://sendune.com/pages/sendwithses-will-soon-become-sendune)**. The most updated pricing information is here:** [**https://sendune.com/pricing**](https://sendune.com/pricing)

**A comprehensive breakdown of AWS SES pricing is available here:** [**https://sendune.com/aws-ses-pricing**](https://sendune.com/aws-ses-pricing)
{% endhint %}

**Send With SES** pricing is simple. The same pricing applies to SENDUNE

* All plans include all features. Only the usage amount varies.&#x20;
* Don't fret comparing plans. Always start with the free plan.
* There are only three plans, FREE, PAID and ENTERPRISE.&#x20;

Below is a comparison table.

<table><thead><tr><th width="184">Feature</th><th width="159">FREE</th><th width="194">PAID</th><th>ENTERPRISE</th></tr></thead><tbody><tr><td><strong>Base Cost</strong></td><td><strong>US$ 0</strong></td><td><strong>US$ 24</strong></td><td><strong>Custom Pricing</strong></td></tr><tr><td><strong>Team members</strong></td><td>1</td><td>3 Included in base price. US$ 10 per extra team member per month.</td><td>Custom</td></tr><tr><td><strong>Contacts</strong></td><td>5000</td><td>100,000</td><td>Unlimited</td></tr><tr><td><strong>Emails</strong></td><td>50000</td><td>250,000</td><td>Unlimited upto your  AWS SES Limits</td></tr><tr><td><strong>SMS</strong></td><td>50000</td><td>250,000</td><td>Unlimited upto your  AWS SMS Limits</td></tr><tr><td><strong>Team Inboxes</strong></td><td>1</td><td>3</td><td>Upto 100</td></tr><tr><td><strong>Data Retention</strong></td><td>90 Days</td><td>1 Year</td><td>Custom</td></tr><tr><td><strong>API Rate Limit</strong></td><td>60 requests/minute</td><td>1800 requests/minute</td><td>Upto 60K requests/minute</td></tr><tr><td><strong>InboxVISA™</strong></td><td>Included</td><td>Included</td><td>InboxVISA + Email/SMS Deliverability Consulting</td></tr><tr><td><strong>Databases</strong></td><td>Shared</td><td>Shared</td><td>Dedicated</td></tr><tr><td><strong>SLA</strong></td><td>None</td><td>None</td><td>99.95% Uptime + Zero Data Loss SLA</td></tr><tr><td><strong>Dedicated Account Manager</strong></td><td>No</td><td>No</td><td>Yes</td></tr></tbody></table>

All prices mentioned are EXCLUSIVE of applicable taxes.

In addition, you will incur AWS charges if you cross the below free tiers. (AWS will bill you directly).

* **Email Charges:** 3000 Free/Month. Then $1 per 10,000 Emails.
* **SMS Charges:** See country wise price list here: <https://aws.amazon.com/sns/sms-pricing/>
* **Push Notification Charges:** 1 Million Free/Month. Then $1/Million Push Notifications.

### Total Cost Estimator.

Make a [copy of this spreadsheet](https://docs.google.com/spreadsheets/d/1ZV3nr6DLwHShrPIHtPll-UjZ-DCadcjsYy-UpDEXq5E/edit?usp=sharing) to estimate your total cost of sending emails/sms/push notifications with **Send With SES**.

{% embed url="<https://docs.google.com/spreadsheets/d/1ZV3nr6DLwHShrPIHtPll-UjZ-DCadcjsYy-UpDEXq5E/edit#gid=0>" %}
Send With SES Total Cost Calculator. If you think there is a mistake in this Cost Estimator, please email <hello@sendwithses.com>.
{% endembed %}

#### **Pricing Links:** [SES Pricing](https://aws.amazon.com/ses/pricing/). [S3 Pricing](https://aws.amazon.com/s3/pricing/). [SMS Pricing.](https://aws.amazon.com/sns/sms-pricing/) [SNS/Push Notifications Pricing](https://aws.amazon.com/sns/pricing/).

#### Also See: [Billing & Refund Policy](https://docs.sendwithses.com/services-and-privacy-terms/refund-policy)


# Contacts

The Contacts page is the first thing you see when you log in to Send With SES. Each of your 'customer' is represented by a 'contact' which is their Email ID or Mobile number. You can add contacts manually or via the API or import a CSV file.

<figure><img src="https://1895149818-files.gitbook.io/~/files/v0/b/gitbook-x-prod.appspot.com/o/spaces%2F-LUFI_-_gHZ4pIVzoRlq%2Fuploads%2Fe0ctPCo4UTnwm4PSbRbs%2Fsignals.png?alt=media&amp;token=69732fe5-12d2-45d8-bd3d-bbf8ab4bb9a1" alt=""><figcaption></figcaption></figure>

The contacts module in Send With SES is VERY powerful and can do a lot more than just store contacts. You can attach lots of 'metadata' to contacts. For example, if a customer adds 'red sneakers' to their wish-list, you attach the '**tag**' \[*red sneakers*] to that particular customer. You can then filter your contacts using these tags to generate your own '**signals intelligence**' and send targeted messages manually or via the API or through set rules (automations).

You can attach as many tags (signals) as required to each customer. In fact every time a customer logs in to your website or app, your can stream and store all of their browsing events in real-time. This way you can construct a time line for each and every customer. You can then analyse this data to under individual customer behaviour as well as collective user behaviour. We call this '**signals intelligence**'.&#x20;

You use the '**Send With SES Contacts API**' to stream and store customer browsing events. This API is usually called to add/update contacts and to attach/detach tags (metadata) to contacts.

{% tabs %}
{% tab title="API Request" %}

```
URL: https://api.sendwithses.com/add-contact
```

```
 {
      "method": "POST",
      "url": "https://api.sendwithses.com/add-contact",
      "headers": {"template-key": "*****************************zkLG"},
      "body": {
          "email": "example@gmail.com",
          "status": "Unsubscribe",
          "full_name": "John Due",
          "mobile": "+918098763849",
          "dob": "10-10-1990",
          "gender": "Male",
          "city": "Hyderabad",
          "country": "India",
          "add_tags": "aaa,bbb,ccc",
          "remove_tags": "ddd,eee,fff"
      }
 }
```

**IMPORTANT:**

* All API calls MUST include the **Contact Upload Secret Key**.
* All API calls MUST include the '**Primary Key**' of the contact. Primary Key is used to uniquely identify a customer in the database. This is either the Email or the Mobile Number of a customer.
* Mobile numbers MUST STRICTLY be in **E.164** format. (Example: +442071838750). Plus (+) followed by country code followed by mobile number WITHOUT spaces, dashes or brackets. See this link for more information <https://support.twilio.com/hc/en-us/articles/223183008-Formatting-International-Phone-Numbers>
  {% endtab %}

{% tab title="API Response" %}
Success Response:

{% code lineNumbers="true" %}

```
 {
      "success": true,
      "message": "Contact added"
 }
```

{% endcode %}

Failed Response:

{% code lineNumbers="true" %}

```
 {
      "success": false,
      "message": "message details",
      "error": "error details"
 }
```

{% endcode %}
{% endtab %}
{% endtabs %}

API calls are subject to rate limits as per your plan. This is the rate at which you can call the Send With SES Contacts API.

<table data-full-width="false"><thead><tr><th>Plan</th><th>Rate Limit (requests/minute)</th></tr></thead><tbody><tr><td>Free</td><td>60</td></tr><tr><td>Paid</td><td>1,800</td></tr><tr><td>Enterprise</td><td>Upto 60,000</td></tr></tbody></table>

To illustrate, the 'Paid Plan' has a stream rate of 1800 requests/minute. This lets you do a steady rate of 30 calls per second or a single burst of 1800 calls in one second or anywhere in between. The total API calls must not exceed 1800 in 60 seconds.

**NOTE-1:** API rate limit is a soft limit for paid plans, meaning you can do short bursts that exceed the rate limits as long as you are not abusing our systems.

**NOTE-2:** API rate limit is independent of your Email/SMS sending rate. [Email/SMS sending rates](https://docs.sendwithses.com/getting-started) are determined by AWS. For example, if your AWS SES email sending rate is 250/second, you can send up to 250 emails per second even if you are on the 'Free Plan'.


# Email

{% hint style="success" %}
Send With SES has been [rebranded](https://blog.sendune.com/send-with-ses-is-now-sendune) as [**SENDUNE**](https://sendune.com)  since July 2024.&#x20;
{% endhint %}

[**SENDUNE**](https://sendune.com) (formerly Send With SES) integrates with your [AWS SES](https://aws.amazon.com/ses/) account to send emails. You can send both Transactional and Marketing emails. You must create a template for each kind of email you wish to send.

### **Create Email Templates**&#x20;

Click the '**Send**' button at the top to open the email composer (see video below). There are three template categories. You can create as many templates as you wish within each category.

* **SENDUNE Designer**: A visual editor that makes it very easy to design emails.
* **HTML Editor**: Use this if want to code your own emails. If you have purchased any HTML template, you can copy-paste that code in the HTML Editor.&#x20;
* **Plain Text**: This is as simple as it gets. Use it compose plain text emails just like you do in Gmail or Outlook. Though they look simple, plain text emails perform very well.

{% embed url="<https://iframe.mediadelivery.net/play/274833/630d31b3-387a-45e0-b2f8-c017c66f577a>" %}

Once your templates are ready you can use them to send emails manually, via the API, or via automated rules (workflows). Remember to send yourself a '**Test Mail**' to make sure your template looks good.

### **Manual Email**

Use this option to send marketing emails to multiple users. To send an email manually, select one or more contacts, choose a template (or compose a new one) and click '**Send**'. Once the emails are sent you can view delivery statistics. See video below.

{% embed url="<https://iframe.mediadelivery.net/play/274833/9711107c-4ce2-4b99-bffd-33fb8dae002d>" %}

### **API Email**

This is used to send transactional emails. The '**send-email'** API is a simple, language agnostic, cURL request. Every email template you create comes with a 'Template Key'. Use this key in the cURL request to programmatically send emails. Click the '**API**' button at the top right of the email composer to find the template key.

{% embed url="<https://iframe.mediadelivery.net/play/274833/414c7d65-187f-43b7-ad45-feded7801262>" %}

{% tabs %}
{% tab title="API Request" %}

<pre><code><strong>URL: https://api.sendune.com/send-email
</strong></code></pre>

{% code lineNumbers="true" %}

```
{
      "method": "POST",
      "url": "https://api.sendune.com/send-email",
      "headers": {"template-key": "***********************HOcm"},
      "body": {
          "email": "example@gmail.com",
          "subject": "Subject",
          "this-is-a-replace-tag": "Value"
       }
}
```

{% endcode %}

**IMPORTANT:**

* All API calls MUST include the **Template Key**.&#x20;
* Template Key is unique to each email template you create.
* Template keys are secrets and must not be used on the client side.
  {% endtab %}

{% tab title="API Response" %}
Success Response:

{% code lineNumbers="true" %}

```
{
      "success": true,
      "message": "Email Sent"
}
```

{% endcode %}

Failed Response:

{% code lineNumbers="true" %}

```
{
      "success": false,
      "message": "message details",
      "error": "error details"
}
```

{% endcode %}
{% endtab %}
{% endtabs %}

### **Replace Tags (Merge Tags)**&#x20;

You can use Replace Tags (aka, Merge Tags) when composing API emails. There are two types of replace tags.

* **Standard Replace Tags:** This is indicated by a unique name within double-curly-brackets, like ... **{{password-reset-link}}**. When sending email, the content within the double-curly-brackets will be replaced by the content you send via your API call.
* **Name Replace Tag:** You generally use this to send personalised emails to your users. This is a special kind of replace tag that must be STRICTLY written as **\[\[name]]** - 'name' in lower case in double square brackets. The **\[\[name]]** in your email template is replaced with the **Full Name** associated with your Contact.

### Workflow Email

Emails can be automated based on **'if-this-then-that'** rules. See this [<mark style="color:red;">section</mark>](broken://pages/OBIEk2jD4HFHz0ggeycJ) for more details.

### \*\* IMPORTANT READING \*\*

{% hint style="danger" %}

### &#x20;**Warming up your email account**

New email accounts that immediately start blasting off a huge volume of emails will trigger spam filters at email service providers (Gmail, Yahoo, Outlook). Once your domain or IP address is flagged as a spammer, it is almost impossible to shake off that reputation.

Every account on SENDUNE is automatically enrolled in the [InboxVISA](https://sendune.com/pages/inboxvisa) program - a collection of email sending best practices and real-time heuristics adopted by SENDUNE to protect you and guide emails safely into user inboxes. While these practices create trust with email service providers, the final decider in inbox placement is the content of your email. Ultimately, the only one who can guarantee safe inbox placement is YOU.

Here are some steps we HIGHLY RECOMMEND you follow in order to warm up your email account.

### Week 1

1. **Send a Few Emails Initially:** Start by sending a small number of emails (10-15 per day) to friends, colleagues, or yourself.
2. **Personalize Your Emails:** Make sure your emails are personalized and relevant to the recipients. Do not use ALL CAPS subject lines, excessive punctuation, or clickbait headlines.&#x20;
3. **Monitor These Initial Emails:** Many email service providers randomly send the first few emails into spam folders. Look out for such emails and mark them as 'Not Spam'.

### Week 2

1. **Increase Volume Gradually:** Slowly increase the number of emails you send each day by 10-20% every few days. Avoid sudden spikes in volume.&#x20;
2. **Monitor Engagement:** Track open rates, click rates, and responses. Adjust your sending volume and email content based on the engagement you receive.

### Week 3 Onwards

By now your email account would have been sufficiently warmed up. You must still follow these best practices to maintain your reputation.

1. **Send Relevant Content:** Always ensure your emails are relevant and valuable to your recipients.
2. **Stay Consistent:** Maintain a consistent sending schedule to build trust with email service providers.

{% endhint %}

***

***

<mark style="color:red;">**Below is the outdated documentation. You can ignore it.**</mark>

***

***

**Send With SES** integrates with your AWS SES account to send emails. You can send emails manually or via the API. You can send both Transactional and Marketing emails.

**MANUAL EMAIL:** To send an email manually, select one or more contacts or filter contacts using the options in the left panel and click "Send Button" at top. You will be shown a popup where you can compose your email. You can use the Send With SES Email designer or the HTML Editor. If you have purchased any HTML template, you can copy-paste that code in to the HTML Editor.

<figure><img src="https://1895149818-files.gitbook.io/~/files/v0/b/gitbook-x-prod.appspot.com/o/spaces%2F-LUFI_-_gHZ4pIVzoRlq%2Fuploads%2FAIxWqJZoZQuqwoOTzFPd%2FSEND-WITH-SES%20email%20manual.png?alt=media&amp;token=89f5b07b-96c5-431c-9942-2bf2e22cfb9a" alt=""><figcaption></figcaption></figure>

**API EMAIL:** You must create a 'Template' for every type of email you wish to send via the API. Click '**+**' in the  Email > API section. Give your template a name and select format and type. Click save. You can now edit the content of a template to suit your needs.

<figure><img src="https://1895149818-files.gitbook.io/~/files/v0/b/gitbook-x-prod.appspot.com/o/spaces%2F-LUFI_-_gHZ4pIVzoRlq%2Fuploads%2FmWff2XPviNeSn6M8tCOf%2FSEND-WITH-SES%20email%20API.png?alt=media&amp;token=38c34fd8-7222-43fa-8552-8b06c24d705a" alt=""><figcaption></figcaption></figure>

**REPLACE TAGS (AKA Merge Tags):** When composing API emails, you can use Replace Tags, also called as Merge Tags. There are two types of replace tags.

1. **Normal Replace Tags:** This replace tag is indicated by a unique name within double-curly-brackets, like ... **{{password-reset-link}}**. When sending email, the content within the double-curly-brackets will be replaced by the content you send via your API call.
2. **Name Replace Tag:** This is a special kind of replace tag that must be STRICTLY written as **\[\[name]]** i.e. lower case name in double square brackets. Use the name replace tag to send personalised emails to your users. This replaces the **\[\[name]]** in your email template with the **Full Name** associated with your Contact.

Click "How To" button below the email template for API details.

{% tabs %}
{% tab title="API Request" %}

<pre><code><strong>URL: https://api.sendwithses.com/send-email
</strong></code></pre>

{% code lineNumbers="true" %}

```
{
      "method": "POST",
      "url": "https://api.sendwithses.com/send-email",
      "headers": {"template-key": "***********************HOcm"},
      "body": {
          "email": "example@gmail.com",
          "subject": "Subject",
          "this-is-a-replace-tag": "Value"
       }
}
```

{% endcode %}

**IMPORTANT:**

* All API calls MUST include the **Template Key**. Template Key is unique to each email template you create.
  {% endtab %}

{% tab title="API Response" %}
Success Response:

{% code lineNumbers="true" %}

```
{
      "success": true,
      "message": "Email Sent"
}
```

{% endcode %}

Failed Response:

{% code lineNumbers="true" %}

```
{
      "success": false,
      "message": "message details",
      "error": "error details"
}
```

{% endcode %}
{% endtab %}
{% endtabs %}


# SMS

**Send With SES** integrates with your AWS SNS account to send SMS (Text Messages). You can send SMS manually or via the API. There are three types of SMS you can send and each type has a predefined template.

| Type of SMS              | How to send         |
| ------------------------ | ------------------- |
| Transactional            | Manually or via API |
| Marketing                | Manually or via API |
| One Time Passwords (OTP) | ONLY via API        |

<figure><img src="https://1895149818-files.gitbook.io/~/files/v0/b/gitbook-x-prod.appspot.com/o/spaces%2F-LUFI_-_gHZ4pIVzoRlq%2Fuploads%2FzL15WsS1zcwg1SOuTajb%2Fsms%20templates.png?alt=media&amp;token=e614e243-6c07-472e-bc7d-c694d00c360e" alt=""><figcaption></figcaption></figure>

***

### **Manual SMS - (Transactional OR Marketing):**&#x20;

To send an SMS manually, select one or more contacts or filter contacts using the options in the left panel and click "Send Button" at top. You will be shown a popup where you can compose your SMS.

<figure><img src="https://1895149818-files.gitbook.io/~/files/v0/b/gitbook-x-prod.appspot.com/o/spaces%2F-LUFI_-_gHZ4pIVzoRlq%2Fuploads%2FOzMbxo0ibGGpAA0tjDmV%2Fsms%20manually.png?alt=media&amp;token=2842464b-da36-48ac-9a1c-b1585f6f079f" alt=""><figcaption></figcaption></figure>

{% hint style="info" %}
**NOTEs:**&#x20;

* Sender ID is optional. Enter only if you have one.&#x20;
* Origination number is required only if you are sending to USA mobile numbers.
  {% endhint %}

***

### **API SMS - (Transactional OR Marketing):** &#x20;

See the request/response details below.

{% tabs %}
{% tab title="API Request" %}

<pre><code><strong>URL: https://api.sendwithses.com/send-sms
</strong></code></pre>

{% code lineNumbers="true" %}

```
{
      "method": "POST",
      "url": "https://api.sendwithses.com/send-sms",
      "headers": {"template-key": "**************************4lVm"},
      "body": {
          "sender_id": "ABCDEF",
          "origination_number": "+449876543212",
          "mobile": "+449876543210",
          "message": "Hello John."
       }
}
```

{% endcode %}

**IMPORTANT:**

* All API calls MUST include the **Template Key**. Template Key is unique to Transactional SMS and Marketing SMS.
* 'Origination Number' is required only when sending to USA mobile numbers.&#x20;
* All mobile numbers MUST be in E.164 format.&#x20;
  {% endtab %}

{% tab title="API Response" %}
Success Response:

{% code lineNumbers="true" %}

```
{
      "success": true,
      "message": "SMS Sent"
}
```

{% endcode %}

Failed Response:

{% code lineNumbers="true" %}

```
{
      "success": false,
      "message": "message details",
      "error": "error details"
}
```

{% endcode %}
{% endtab %}
{% endtabs %}

***

### **OTP SMS - (Can be sent via API ONLY):** &#x20;

OTP SMS is used to send one time codes intended for Two-Factor Authentication (2FA) or other high value transactions within your website or mobile app. OTP SMS has a template that allows you to customize fields like App Name, OTP Size, and OTP Expiry Time.

<figure><img src="https://1895149818-files.gitbook.io/~/files/v0/b/gitbook-x-prod.appspot.com/o/spaces%2F-LUFI_-_gHZ4pIVzoRlq%2Fuploads%2Fv1kXjCivVsyBnJ3BkCMl%2Fsms%20OTP.png?alt=media&amp;token=74565974-2e19-4e5d-a406-5a80323b38b5" alt=""><figcaption></figcaption></figure>

The OTP SMS includes two parts, ***Send API*** and ***Verify API***.

{% tabs %}
{% tab title="Send API" %}
Send API is used to trigger the SMS containing one time code to the end user.

```
URL: https://api.sendwithses.com/send-otp
```

**Request:**

{% code lineNumbers="true" %}

```
{
      "method": "POST",
      "url": "https://api.sendwithses.com/send-otp",
      "headers": {"template-key": "****************************elA2"},
      "body": {
          "sender_id": "ABCDEF"
          "origination_number": "+449876543212"
          "mobile": "+449876543210",
       }
}
```

{% endcode %}

**Success Response:**

```
{
      "success": true,
      "message": "OTP Sent"
}
```

**Failed Response:**

{% code lineNumbers="true" %}

```
{
      "success": false,
      "message": "message details",
      "error": "error details"
}
```

{% endcode %}

**IMPORTANT:**

* All API calls MUST include the **Template Key**. Template Key is unique to OTP SMS.
* 'Origination Number' is required only when sending to USA mobile numbers.&#x20;
* All mobile numbers MUST STRICTLY be in E.164 format.
  {% endtab %}

{% tab title="Verify API" %}
Verify API is used to match the one time code received from end user with the code generated during the Send API call.&#x20;

```
URL: https://api.sendwithses.com/verify-otp
```

**Request:**

{% code lineNumbers="true" %}

```
{
      "method": "POST",
      "url": "https://api.sendwithses.com/verify-otp",
      "headers": {"template-key": "***********************elA2"},
      "body": {
          "mobile": "+449876543210"
          "otp": "123456",
       }
}
```

{% endcode %}

**Success Response:**

{% code lineNumbers="true" %}

```
{
      "success": true,
      "message": "OTP Verified"
}
```

{% endcode %}

**Failed Response:**

{% code lineNumbers="true" %}

```
{
      "success": false,
      "message": "message details",
      "error": "error details"
}
```

{% endcode %}

**IMPORTANT:**

* All API calls MUST include the **Template Key**. Template Key is unique to OTP SMS.
* 'Origination Number' is required only when sending to USA mobile numbers.&#x20;
* All mobile numbers MUST STRICTLY be in E.164 format.
  {% endtab %}
  {% endtabs %}


# Push Notifications

Coming soon.

Coming soon.


# Team Inbox

Coming soon.

Coming soon. [Join Waitlist](https://forms.gle/7J2G1ndtsxfDJZMM7).


# Email FAQs


# How Many Emails Can I Send ?

The number of emails you can send depends mainly on the [limits](https://docs.aws.amazon.com/ses/latest/DeveloperGuide/manage-sending-limits.html) imposed on your account by AWS SES.

Login to your [AWS SES Dashboard](https://console.aws.amazon.com/ses) and click 'Sending Statistics' in the left pane. You will see something like in the below image. According to this image, AWS has permitted this account to send emails at a maximum rate of 14 emails per second and upto 100000 emails per day.

![](https://1895149818-files.gitbook.io/~/files/v0/b/gitbook-legacy-files/o/assets%2F-LUFI_-_gHZ4pIVzoRlq%2F-LUigK9-s6rItv4mp4c9%2F-LUinuTe8scgIkNl_QS6%2FSES%20Management%20Console.png?alt=media\&token=a0afe0af-8bc6-4cd8-bfe7-401a0d06acba)

To prevent abuse AWS gives new accounts a very low sending limit. You can request to [increase these limits](https://sendwithses.gitbook.io/helpdocs/how/how-to-increase-aws-ses-sending-limits.). They will do so gladly but only if your email sending reputation is good. **So make sure you don’t send out any unsolicited emails**.

When you send an email campaign, **Send With SES** tries to send out your mails as fast as your current AWS SES limits allow. Sending emails also depends on your current **Send With SES** Bill Plan irrespective of the limits imposed by AWS SES.


# Email Delivery Times.

How long will it take for my emails to be delivered?

Delivery of your emails depends on your AWS SES sending limits. Let's say your 'Sending Quota' is 100,000 emails per day and 'Send Rate' is 14 emails/second. In theory it would take approximately 60 minutes to send 50,000 emails.

$$
(50000/14)=3571 Seconds=60 Minutes
$$

In reality it would take a bit longer to deliver emails. Our real-world sending stats indicate average delivery times about 2 times the theoretical value.

Once an email is delivered it would trigger various [delivery notifications](https://docs.aws.amazon.com/ses/latest/DeveloperGuide/monitor-sending-activity.html) (sent, delivered, bounced, opened, clicked, complaint, etc.). While 'sent' and 'delivered' stats come in quickly, the rest can take their own sweet time because they are dependent on the recipient email server and end user actions.

{% hint style="info" %}
**To increase your email sending limits see this** [**article**](https://docs.sendwithses.com/how/send-email/how-to-increase-aws-ses-sending-limits)**.**
{% endhint %}


# Email Bounces & Complaints.

Send With SES handles email bounces, complaints, and unsubscribes out of the box.

**Bounces:** When an email you send cannot be delivered to the recipient, it results in 'bounce'. Send With SES flags such email id's and will no longer deliver emails to these id's. AWS SES expects **bounce rates** to remain below 5%. Senders with a **bounce rate** exceeding 10% risk a sending pause and/or complete ban.&#x20;

**Complaints:** When the recipient of your email marks your email as spam, it is treated as a 'complaint'. Send With SES flags such email id's and will no longer deliver emails to these id's. AWS SES expects **complaint rates** to remain below 0.1%. Senders with a **complaint rate** exceeding 0.5% risk a sending pause and/or complete ban.

**Unsubscribes:** When a recipient of your email no longer wants to receive your email, he can unsubscribe and will no longer receive your emails. A high unsubscribe rate is a strong indicator you are sending unsolicited email (spam).

{% hint style="danger" %}
**IMPORTANT:** If your bounce/complaint rates are over the permissible limits, AWS SES will place a pause or complete ban on your ability to send further emails. In such cases you will need to follow up with AWS to lift such bans. Send With SES cannot help you in this regard.

Notwithstanding the limits imposed by AWS SES, Send With SES monitors your sending reputation in real time and will ban your account if your SBUR (Spam + Bounce + Unsubscribe + Reject) rate is >=5%
{% endhint %}

Read More:\
[Amazon SES and Deliverability](https://docs.aws.amazon.com/ses/latest/DeveloperGuide/deliverability-and-ses.html)\
[Using the Reputation Dashboard to Track Bounce and Complaint Rates](https://docs.aws.amazon.com/ses/latest/DeveloperGuide/reputation-dashboard-dg.html)\
[Email Program Success Metrics](https://docs.aws.amazon.com/ses/latest/DeveloperGuide/success-metrics.html)<br>


# Do I Need A Domain To Send Emails With Amazon SES ?

To send email, Amazon SES requires that you verify your email address or your domain.

If you send emails without verifying your domain, the recipient’s email client displays **“sent via amazonses.com”**. This is because by default emails from Amazon SES are sent from their domain *amazonses.com*. &#x20;

When you verify your domain with Amazon SES …

1. Your emails are sent as originating from your domain and not from *amazonses.com*. Trust-wise, it is always better to show the recipient of your email that the email originated from your organization/company’s domain.
2. You can also setup other things like [SPF](https://en.wikipedia.org/wiki/Sender_Policy_Framework), [DKIM](https://en.wikipedia.org/wiki/DomainKeys_Identified_Mail), [DMARC](https://en.wikipedia.org/wiki/DMARC), etc., which greatly enhance email deliverability.
3. You are verifying all email addresses from that domain, so you don’t need to verify individual email addresses from that domain. For example, if you verify the domain *xyz.com*, you can send email from *<user1@xyz.com>*, *<user2@xyz.com>*, or any other user at *xyz.com*.

**So it is always recommended that you verify your domain with Amazon SES**.

While all this sounds technical and cumbersome, it is actually quite easy to do these setups via [**Send With SES**](https://sendwithses.com/).

**Need help? Write to <help@sendwithses.com>**


# SMS FAQs


# SMS Deliverability

SMS's are of two types. When triggering an SMS you must mention the type.&#x20;

1. ***Promotional*** – Noncritical messages, such as marketing messages. Most Promotional SMS's are delivered but a few can be undelivered - usually because your messages have been blocked by the end user or by the telecom provider.&#x20;
2. ***Transactional*** – Critical messages that support customer transactions, such as one-time passcodes (OTP). Transactional SMS's are almost always delivered

All countries and telecom providers within those countries place numerous restrictions, especially on Promotional SMS. For example, you cannot send Promotional SMS to Indian mobile numbers during 9PM - 9AM.

**DO NOT ever make the mistake of sending Promotional SMS's under the Transactional route.** Newbies always assume they can get away with this practice. Mobile phone users tend to have a very low tolerance for unsolicited SMS messages. Response rates for unsolicited SMS campaigns will almost always be low, and therefore the return on your investment will be poor.

**REMEMBER**: You are billed for SMS's even if they are undelivered.

Additionally, mobile phone carriers continuously audit bulk SMS senders. They throttle or block messages from numbers that they determine to be sending unsolicited messages. **Once you get on the block list, it is impossible for you to get out.**

### Read More: [SMS Best Practices](https://docs.aws.amazon.com/pinpoint/latest/userguide/channels-sms-best-practices.html).


# Push FAQs

Launching Q4-2023

Launching Q4-2023


# Dedicated Account Manager

When you signup for the **Enterprise Plan** you are assigned a **Dedicated Account Manager** who will have an ongoing context about your business and will assist you with everything right from the basics.&#x20;

You will have direct access to your Account Manager via email and phone.

### **Need help? Write to <hello@sendwithses.com>**


# Services and Privacy Terms.

1. Welcome to Send With SES ([www.sendwithses.com](https://docs.sendwithses.com/services-and-privacy-terms/www.sendwithses.com)). Send With SES is a product by Kepler Data Science PTE. LTD.\
   &#x20;
2. Your use of Send With SES and service (collectively, "Services") is governed by this agreement. The Services are offered subject to your acceptance without modification of all of the Services and Privacy Terms contained herein. <br>
3. Read these Services and Privacy Terms carefully before accessing or using the Services. By accessing or using any of the Services, you agree to become bound by the terms and conditions of this agreement. You may not access the Services if you do not agree to ALL the terms and conditions of this agreement.\
   &#x20;
4. You cannot use Send With SES Services if you are a person barred from receiving the Services under the laws of your country, including the country in which you are resident of from which you use the Services. You affirm that you meet the minimum age required by law for you to work, in your country or jurisdiction. <br>
5. Restrictions: Businesses or individuals in the following countries are not permitted to register for accounts or utilize our platform: Iran, North Korea, Syria, Crimea, Cuba, and any other country restricted by law (this changes occasionally). Send With SES does not conduct business with individuals and entities on the Specially Designated Nationals ("SDN") list. More information on these laws, click [here](http://www.treasury.gov/resource-center/sanctions/Programs/Pages/Programs.aspx). In addition, there may be other countries we do not currently service. Interested parties in these locations will be unable to complete account registration.<br>
6. You cannot use Send With SES in any way that interferes others from using Send With SES. If you use the Services in an unreasonable way we reserve the right to disable your access to Send With SES without any notice to you.\
   &#x20;
7. Send With SES  is a message sending service (email, sms, push notifications, etc.). You are not allowed to send any unsolicited messages. If your SBUR (Spam + Bounce + Unsubscribe + Reject) rate is >=5% you are automatically banned without any prior intimation. <br>
8. Use of the Services requires that your data be stored in our servers. This data is your property. Your account information such as your email id, password, payment information, address, and other private account data will never be sold or distributed to third parties except as required to provide you our service. Your email id will be used to notify you of critical updates or announcements. It may also be used to send you regular updates about your account activity and news about Send With SES. <br>
9. We collect non-identifying statistical data about usage. We use cookies to store browsing information, such as your site preferences or profile information. We reserve the right to use this data to improve our service and for marketing purposes. <br>
10. Send With SES reserves the right to charge non-refundable fees for some or all of its Services. Fees, taxes, and other charges will be billed to your credit card or any other payment collection service. Send With SES will suspend or terminate your access to the Services if you fail to pay full amount when due. Send With SES reserves the right to revise its fees and other charges from time to time. See [Billing & Refund Policy](https://sendwithses.gitbook.io/helpdocs/services-and-privacy-terms/refund-policy).<br>
11. This Agreement does not transfer from Send With SES to you any Send With SES or third party intellectual property. <br>
12. Send With SES reserves the right to add to/delete/modify the Services and Privacy Terms from time to time. <br>
13. The Services are provided "as is". Send With SES hereby disclaims all warranties of any kind, express or implied, including, without limitation, the warranties of merchantability, fitness for a particular purpose and non-infringement. Send With SES makes no warranty that the Services will be error free, timely, secure, or uninterrupted. You understand that your use of the Services is at your own discretion and risk. <br>
14. In no event will Send With SES be liable for: (i) any damages; (ii) the cost of procurement of a substitute product or (iii) any interruption of use or loss or corruption of data. The foregoing shall not apply to the extent prohibited by applicable law. <br>
15. You agree to indemnify and hold harmless Send With SES, its officers, directors and employees, customers, users, and all third-party services from and against any claims, losses or damages, including court costs and reasonable attorneys' fees, arising out of your use of the Services, including but not limited to your violation of this Agreement. <br>
16. The laws and courts of Singapore will have exclusive jurisdiction in respect of disputes arising in connection with this Agreement, without regard to conflict of law principles. <br>
17. Contact Information. Direct all correspondence to hello-at-sendwithses-dot-com.&#x20;

Current Version - 1.14.June.2020 \
© Kepler Data Science PTE. LTD. 68 Circular Road #02-01 Singapore (049422).


# Billing & Refund Policy

1. **Billing Cycle:** Your billing cycle starts on the day you signed up for a paid plan and renews monthly. Plan usage limits are reset on this day.
2. **Automatic Billing:** Your card details are securely stored with with our payment processors and your card is automatically billed every month as per your plan charges.
3. **Moving from Free to Paid Plan:** Your card is immediately charged as per the plan amount.
4. **Moving from Low to High Priced Plan:** Prorated balance from the Low Price Plan if any is deducted from the High Price Plan and the balance is charged immediately to your card.
5. **Moving from High to Low Priced Plan:** Prorated balance from the High Price Plan if any will be adjusted towards the Low Price Plan subject to meeting conditions in Points 8 & 9 below.
6. **Moving from a Paid to Free Plan:** Your Paid Plan will be converted to the Free Plan at the end of the current billing cycle and you will no longer be billed. All privileges of the Paid Plan will continue for the duration of the plan.
7. **No longer using Send With SES?** Switch to the Free Plan if you are paying for but no longer wish to use Send With SES. Your paid plan will be converted to the free plan at the end of the current billing cycle and you will no longer be billed. Please write to <hello@sendwithses.com> to completely delete your account and all associated data.
8. **PLAN ABUSE:** You will not be refunded if you switch to a High Priced Plan, send more than 1,000 emails, and then switch back to a Low Priced or Free Plan.
9. **USAGE ABUSE:** Send With SES is mainly intended for sending transactional emails and sms. Accounts that use it mainly for marketing related communications will be banned without prior intimation.
10. **SPAM SENDERS:** You will not be refunded if your account is marked as a Spammer (Bounce + Unsubscribe + Complaint Rate >= 5%).

{% hint style="info" %}
Billing Support: <hello@sendwithses.com> \
Legal Billing Entity: Kepler Data Science PTE. LTD. \
Your bank will mention Send With SES or SWSES or SEND.W\.SES in your billing statement.
{% endhint %}

### **Need help? Write to <hello@sendwithses.com>**


# AWS Pinpoint Alternative

Send With SES is a surefire alternative to AWS Pinpoint if you do not want to directly deal with multiple AWS services and wrangle with their API’s.

Amazon Web Services always had the features to send Emails (SES), SMS (via SNS), and Push Notifications (also via SNS). But AWS never had a straight forward way to send messages and track deliveries. You had to deal with multiple services within AWS and wrangle with their API’s. In the case of SMS, you have send SMS through their SNS service and track deliveries via CloudWatch or CSV log files written to S3.

AWS seems to have recognized that ‘messaging’ is as important a service as any other. They have launched a service called [AWS Pinpoint](https://aws.amazon.com/pinpoint/) which enables AWS customers to effectively communicate with their end users across multiple channels including Email, Text Messaging (SMS) and Mobile Push Notifications. Before Pinpoint you had to achieve this by integrating your app with multiple AWS services like SES, SNS, SMS, S3, SQS, CloudWatch, etc.

Sadly, AWS has rolled out Pinpoint with an altogether different set of monsters to deal with. First, Pinpoint can get needlessly expensive as it charges [$0.0012](https://aws.amazon.com/pinpoint/pricing/) per customer tracked. Second, the Pinpoint [Delivery Dashboard](https://docs.aws.amazon.com/en_pv/pinpoint/latest/userguide/channels-email-deliverability-dashboard.html) (a sort of UI to see things like delivery metrics, bounce notifications, etc.) costs $1,250 per month — **SERIOUSLY** — a huge charge for something that should have been a basic requirement. This rules out Pinpoint for Small and Medium Businesses (SMB’s).

### Send With SES — AWS Pinpoint Alternative.

[**Send With SES**](https://www.sendwithses.com) is a surefire alternative to AWS Pinpoint if you do not want to directly deal with multiple AWS services and wrangle with their API’s. **Send With SES** also costs a lot lesser than AWS Pinpoint.

**Send With SES** does all the grunt work of integrating with various AWS services to get you seamless message (Emails, SMS, Push Notifications) delivery. **Send With SES** reduces everything to a simple API call. So if you wish to send an Email or SMS, you just make an API call to the respective URLs;

> <https://api.sendwithses.com/send-email>\
> or\
> <https://api.sendwithses.com/send-sms>

The **Send With SES** dashboard comes with a full fledged Contacts management module. You can add a Contact manually or via the API. You can attach ‘**tags’** to Contacts and filter Contacts using these tags to send targeted messages. Every message (Emails, SMS, Push Notification) is tracked to give you individual message level statistics as well as aggregate campaign level metrics (sent, delivered, opened, clicked, spam, etc.).

**Send With SES** has a free plan. Pricing details are available [here](https://docs.sendwithses.com/pricing).

{% hint style="success" %}
Thanks to '**elevatordings**' for the [original post](https://medium.com/@elevatordings/sending-sms-text-messages-with-aws-amazon-web-services-why-dont-more-businesses-use-aws-sms-c4b64de5cb1b).
{% endhint %}

####


# Send With SES Alternatives

Note: This page is no longer being updated.

### Send With SES lets you send Emails, SMS, and Push Notifications to your customers. Most others only let you send emails. <a href="#send-with-ses-lets-you-send-emails-sms-and-push-notifications-to-your-customers-mailchimp-only-lets" id="send-with-ses-lets-you-send-emails-sms-and-push-notifications-to-your-customers-mailchimp-only-lets"></a>

While we'd like you to use [Send With SES](https://www.sendwithses.com), we thought it fair to list out a few other Email Service Providers (ESPs). The ESPs listed here have a good product but cost more. If you are already using one of them and are happy with the price, you should stick with them.&#x20;

Almost all these ESPs have complex pricing strategies. You will need to select a feature-limited-plan first and within that plan you will be charged based on the contacts you store and/or the number of emails you send.

By contrast, Send With SES comes with these irrevocable promises ... now and in future ......

* All plans (including the Free Plan) include all features.
* You are not charged based on the number of contacts/subscribers you have.

#### Send With SES Alternative Email Service Providers (ESPs)

| ESP              | Pricing Link                              |
| ---------------- | ----------------------------------------- |
| Mailchimp        | <https://mailchimp.com/pricing/>          |
| Sendgrid         | <https://sendgrid.com/pricing/>           |
| Sparkpost        | <https://www.sparkpost.com/pricing/>      |
| Mailgun          | <https://www.mailgun.com/pricing>         |
| Elastic Email    | <https://elasticemail.com/pricing/>       |
| Active Campaign  | <https://www.activecampaign.com/pricing/> |
| Constant Contact | <https://www.constantcontact.com/pricing> |
| Intercom         | <https://www.intercom.com/pricing>        |
| Postmark         | <https://postmarkapp.com/pricing>         |

![](https://1895149818-files.gitbook.io/~/files/v0/b/gitbook-legacy-files/o/assets%2F-LUFI_-_gHZ4pIVzoRlq%2F-LywM3cDmawNgxZPTtID%2F-LywM9CfaCxMui-A8fZu%2FPricing%2019Jan2020.png?alt=media\&token=941df3cf-d915-4edc-bedd-8607d3d49088)

{% hint style="info" %}
**Send With SES will always cost lesser than any other Email Service Provider.**
{% endhint %}


# Easy to Remember Color Guide for Non-Designers

{% hint style="info" %}
**NOTE**: I'm not a designer. This is what i've self-learnt over the years because i couldn't afford good designers. I don't know if this is scientific. This works for me. I hope it works for you.
{% endhint %}

I think you already know that a color is represented by a [6 digit code](https://en.wikipedia.org/wiki/Web_colors) (hex code) containing any permutation of the the six alphabets **a,b,c,d,e,f** and the ten digits **0,1,2,3,4,5,6,7,8,9**. The hex codes i use and describe here are the ones i chanced upon over the years. They are easy to remember and i don't need to keep referring to any color picker tool.

For any app, you will need colors for ...&#x20;

1. Main Theme Color(s)
2. Text
3. Backgrounds, Boxes, Lines

### 1. Main Theme Color

Remember VIBGYOR (Violet, Indigo, Blue, Green, Yellow, Orange, Red) from school days? You can generate a nice VIBGYOR palette using a permutation of just four codes **c, f, 6, 9** ... like so ...

![Violet, Indigo, Blue, Green](https://1895149818-files.gitbook.io/~/files/v0/b/gitbook-legacy-files/o/assets%2F-LUFI_-_gHZ4pIVzoRlq%2F-L_bOd9rj2aX7LMVYlPE%2F-L_bfD6ToOq1hVYa1KdV%2FVIBG.png?alt=media\&token=cbb4cdad-b88d-41f9-8c93-deef497d89d0)

![Yellow, Orange, Another Orange, Red](https://1895149818-files.gitbook.io/~/files/v0/b/gitbook-legacy-files/o/assets%2F-LUFI_-_gHZ4pIVzoRlq%2F-L_bOd9rj2aX7LMVYlPE%2F-L_bfI-npsXbpu-N2oQS%2FYOOR.png?alt=media\&token=f00c3544-2239-487f-a67a-0e45c5952691)

The colors above are the softer side of their darker variants. The darker colors (for example the darkest red is ff000) are harsh on the eyes and are best avoided.

Prefer soft pastel colors instead? Just remember **a,b,c,d,e,f**. Using a permutation of these six codes (abcdef, bafedc, etc.) you can generate many soft pastel colors ... like below ...

![Just A-B-C-D-E-F](https://1895149818-files.gitbook.io/~/files/v0/b/gitbook-legacy-files/o/assets%2F-LUFI_-_gHZ4pIVzoRlq%2F-L_f57A2_Pn5qIm_7zhd%2F-L_fFEz3HiuF56FdXXvW%2FABCDEF.png?alt=media\&token=f4f66d87-c598-49a1-8bfa-33a243f84f82)

### 2. Text

Text is usually dark (blacks). Here also i tend to avoid the darkest darks (full black is 000000). I like the colors below because they give me a nice dark blue tint. The codes are also easy to remember. **1a2a3a** is darker and you can go all the way to **7a8a9a** which is lighter.

![Text Colors](https://1895149818-files.gitbook.io/~/files/v0/b/gitbook-legacy-files/o/assets%2F-LUFI_-_gHZ4pIVzoRlq%2F-L_bOd9rj2aX7LMVYlPE%2F-L_biYb4pXHYiy3qCwOH%2FTEXT.png?alt=media\&token=fa766672-82d4-49be-a8fc-1e1f9a35a2cb)

### 3. Backgrounds, Boxes, Lines

These are usually grays (or 'greys' if you insist). Mostly used for backgrounds, table header or table row colors, lines, and, occasionally for text. These hex codes are the easiest to remember.

![Grays](https://1895149818-files.gitbook.io/~/files/v0/b/gitbook-legacy-files/o/assets%2F-LUFI_-_gHZ4pIVzoRlq%2F-L_bOd9rj2aX7LMVYlPE%2F-L_bngDe3TB8V2KdsQ6L%2FGREYS.png?alt=media\&token=b66786d6-d154-4af0-97ff-ba1a0ee449de)

That's all there is. Once you get a hang of this it becomes easy to play around and arrive at colors that you like better than what are presented here. I recommend <https://colorhunt.co/>. You should check out [Canva's Color Wheel](https://www.canva.com/colors/color-wheel/) too.

{% hint style="success" %}
Discuss this article on HN: <https://news.ycombinator.com/item?id=19400870>
{% endhint %}


# The internet is an SEO landfill

I have a [product](https://www.sendwithses.com) that can be explained in one or two sentences. It is fairly well [documented](https://docs.sendwithses.com/). Yet i’m being asked to write 4,000 word articles describing and comparing my product with the competition. Why? Because SEO.

I’m being wooed by a couple of ‘SEO Consultants’ who claim their expertise is guaranteed to get me on to the first page of a Search Engine’s results. They claim a ‘multi-pronged’ strategy. First they check my website to make sure it has all the appropriate tags, keywords, descriptors. That taken care of, they have a bunch of blogs where they will write articles about my product. Then they will get a bunch of ‘paid-influencers’ to write articles about my product. Simultaneously they have a team that posts questions about my product (and the answers) on Quora and other social media forums - basically seeding a link of my site on as many other sites as they can get hold of.&#x20;

All these and one final trick of trade. That is to set up an ad account and pay the Search Engine to show my site at the top of search results. Why? Because there’s so much competition in my line of business and i need the initial paid traffic. The logic peddled is once i start paying the ‘search tax’ more people will start clicking my link, and in a few months my site will start to show up organically in the first page of search results. Of course, it’s never just a few months. I must pay to stay.

Why do all this? Simple. To trick or treat the Search Engine into assuming my product is popular. With many different people (and sock puppets) writing and talking about my product, the Search Engine assumes my product is popular and slowly starts bubbling it up in search results. Does this work? ABSOLUTELY - according to the SEO Consultants. They present their proof. I’m blown by their confidence.

I like to think search ranking algorithms are not as complex and machine-intelligent as they’re made out to be. They just bubble up the most gossiped links. Search Engines need some kind of validation to decide what’s popular. What better validation than gossip.

And that’s what the internet has become. Full of gossip, junk content, paid posts, con articles, click bait links, sock-puppetry, spam, regurgitated spam, free e-books, self aggrandizement, fake followers, fake news, - all designed to achieve one thing - con the Search Engine - and you.

Don’t the makers of Search Engines know this? Of course they do. It’s just not in their interest to bring clarity.&#x20;

SEO Consultants are an unpaid army of evangelists who channel billions of dollars in ad revenue to Search Engines. Why would a Search Engine want to disown the evangelists when so much money is at stake!

SEO is easy money. It attracts the bottom feeders of the tech world. It’s easy to make a livelihood off of SEO. Why? Because it requires little skill. The startup costs are little. There’s a huge and easy market … lots of entrepreneurs who will grab at any straw of hope that promises to make their product more visible.&#x20;

{% hint style="success" %}
**UPDATE: 25-June-2019**\
**Follow the discussion on Hacker News:** [**https://news.ycombinator.com/item?id=20256764**](https://news.ycombinator.com/item?id=20256764)
{% endhint %}


# Simple Startup Cashflow Projections (Spreadsheet)

As a Founder, estimating and projecting your cashflows can give you enormous decision making clarity. This '***Simple Startup Cashflow Projections***' spreadsheet can provider faster insights on the state of your finances than your accounting software. We made this spreadsheet many years ago for our internal use. We hope you will find this useful as much as we have.

Just make a copy of the below Google Sheet to start using it. The only caveat is, you should be ***'un-emotional'*** when plugging in your numbers.&#x20;

#### <https://docs.google.com/spreadsheets/d/1ILiW2AHtqbYA4RWPlXJ3GKm-nDS3DVuxwhhASlPATkM/edit?usp=sharing>&#x20;

{% embed url="<https://docs.google.com/spreadsheets/d/1ILiW2AHtqbYA4RWPlXJ3GKm-nDS3DVuxwhhASlPATkM/edit?usp=sharing>" %}

{% hint style="danger" %}
**NOTE: This spreadsheet is NOT a substitute for regular accounting software.**
{% endhint %}

{% hint style="success" %}

#### Discuss this article on HN: <https://news.ycombinator.com/item?id=20507992>

{% endhint %}


# Feedback Noise

### You had an idea and you built an app. Now comes the scary part ...

You showed the app to a bunch of people and asked what they thought. Here’s what i’m 100% sure happened. Invariably every one of them had something to say - wanted something about the app changed - a color, an icon, a navigation issue, and most probably an extra feature your app didn’t have. Not one - NOT A SINGLE ONE - must have told you your app looked fine as it were. And almost all the people who gave you some or other feedback must have used your app for no more than 5 minutes … the app that you spent months crafting.

Why do people do that? What’s happening here?

Here’s what i presume is happening. When asked for their opinion, people have three choices ...

1. Say something.
2. Say nothing - which might indicate “I don’t care”.&#x20;
3. Saying the app is fine as it were - which might indicate “I didn’t bother spending enough time on the app”.&#x20;

Most people are generally nice. They don’t want to offend you. This rules out choices 2 and 3 above. So invariably they ‘say something’ ... without actually meaning it. So there’s a lot of feedback noise. This creates a problem for you. How do you filter this noise?&#x20;

Here are some guidelines i follow ...

1. Pay heed only to users who have used your app 3 or more times over a week.
2. Consider a new feature request only when 3 or more people have ‘independently’ requested it.
3. Sit along with at least 6 friends (one or two at a time) and just watch them use your app for the first time. Don’t guide them. Just watch them silently. This exercise will throw up more genuine feedback than you would imagine.&#x20;
4. Value unsolicited feedback. These users took the trouble to send you feedback without you asking for it. It means something.&#x20;
5. Finally, remember this … Unknowingly you have developed a lot of intuition as you were building your app. When somebody gives you a genuine piece of advice - it immediately ‘strikes’ you. YOU KNOW this because it hits you at the same frequency of your thoughts/intuitions (i couldn’t find better words to describe this phenomenon).&#x20;

So to wrap it up, don’t let the initial feedback from users put you down. Most of this feedback is just noise. Trust your intuition and keep doing what you do.<br>

{% hint style="success" %}

#### Discuss this article on HN: <https://news.ycombinator.com/item?id=21299318>

{% endhint %}


# Enemy At The (Billing) Gates

An online payment of USD 150 generates USD 14 for the middlemen.

## If you sell any product/service online, the journey of money from a paying customer to your bank account has a story to tell.

We launched [**Send With SES**](https://www.sendwithses.com) ~~a few months ago~~ in early 2018. Currently **Send With SES** accepts only USD. This means, if you are a customer outside USA, you are charged in your local currency but your bank/card company pays us in USD. **Send With SES** is based in Singapore. So [Stripe](https://stripe.com) (our payment gateway) which receives this USD amount on our behalf, converts it to SGD and transfers it to our bank account.

### Well, that’s the theory. Let’s see a real life case ...

A customer (and friend) from India recently subscribed to our Medium Plan ($150).&#x20;

### Expectations ...

Customer expects to pay USD 150 (INR 10,620) and Send With SES expects to receive USD 150 (SGD 204).

### Reality ...

1. **Customers Bank adds its fees and charges Customer INR 11,049 (USD 156)**
2. Stripe receives: USD 150 (SGD 204)
3. Stripe currency conversion charges: 2% x 204 = SGD 4
4. Gross Stripe Amount: 204 - 4 = SGD 200
5. Stripe charges: 3.4% x 200 + 0.5 = SGD 7.3
6. **Net paid by Stripe to Send With SES: 200 - 7.3 = SGD 192.7 (142 USD)**

### In effect, this is what has happened ...

* Customer expects to pay USD 150 but pays USD 156
* Business expects to receive USD 150 but receives USD 142
* **An online payment of USD 150 has generated USD 14 for the middlemen.**

There is nothing wrong in this. Banks and Payment Gateways like Stripe play a '*valuable*' role in the movement of money. This is the price we pay for the ease of doing business.&#x20;

{% hint style="success" %}
**Bank and Payment Gateway charges can be significant. You need to account for these in any** [**CashFlow Projections**](https://docs.sendwithses.com/random-stuff/startup-cashflow-projections-spreadsheet) **you do. I would suggest you calculate these charges at&#x20;**~~**5%**~~**&#x20;6% of your revenue.**&#x20;
{% endhint %}

### Just understand that when it comes to online payments, you always pay more ...&#x20;

![Customer bank statement](https://1895149818-files.gitbook.io/~/files/v0/b/gitbook-legacy-files/o/assets%2F-LUFI_-_gHZ4pIVzoRlq%2F-LsWA6x8xEz5HbI3kAlq%2F-LsWBI6c9Yve25NHKG5Z%2FWhatsApp%20Image%202019-10-31%20at%2012%2016%2058.png?alt=media\&token=5add220b-3035-4897-98cd-42a52584aab4)

### ... or receive less than what you expect.&#x20;

![Stripe statement for Send With SES](https://1895149818-files.gitbook.io/~/files/v0/b/gitbook-legacy-files/o/assets%2F-LUFI_-_gHZ4pIVzoRlq%2F-LsWA6x8xEz5HbI3kAlq%2F-LsWBNLLsNtjV5B0l5rK%2FDashboard%20%E2%80%93%20Kepler%20Data%20Science%20PTE%20%20LTD%20%20%E2%80%93%20Stripe.png?alt=media\&token=36d8ec73-ca45-4dff-82cb-5ff16db4974a)

### There are few ways to reduce these charges ...

1. Show and accept prices in local currencies so your customers know exactly how much they are paying. Stripe and most other payment gateways allow you [to do this](https://stripe.com/docs/currencies#presentment-currencies).&#x20;
2. Get a bank account which accepts the same currency as your [settlement currency](https://stripe.com/docs/payouts#supported-accounts-and-settlement-currencies). This will help you avoid currency conversion charges.
3. Register your business in a [low-stripe-charge](https://stripe.com/ie/pricing) country.
4. If you have a large payments volume, you can negotiate with Stripe (or your payment gateway) to reduce them.&#x20;

Do you know of any other ways? Let us know .. hello<@>sendwithses<.>com.

{% hint style="info" %}
**Note:** All currency conversions done using [xe.com](https://www.xe.com) on 31-October-2019
{% endhint %}

{% hint style="success" %}

#### Discuss this article on HN: <https://news.ycombinator.com/item?id=21565784>

{% endhint %}


# Stripe Country Comparison (Spreadsheet)

[Stripe](https://stripe.com/) is currently available in [33 countries](https://stripe.com/global). The charges vary country by country. As a thumb rule, Stripe charges are \~ 6%.

This [**Google Sheet**](https://docs.google.com/spreadsheets/d/1wqs3LHNPZsKymxszsmSaUaiCXgPc-VjIVCvYAdj00xI/edit?usp=sharing) compares all 33 Stripe countries. Make a copy if you wish to edit it.

{% embed url="<https://docs.google.com/spreadsheets/d/1wqs3LHNPZsKymxszsmSaUaiCXgPc-VjIVCvYAdj00xI/edit?usp=sharing>" %}

Stripe charges depend on four main factors.&#x20;

1. **Business Location:** The country where your company (and bank account) is registered.
2. **Customer Card Type:** Local cards are charged less while international cards are charged about 1.5% more. &#x20;
3. **Presentment Currency:**  The currency in which you bill your customers.
4. **Payout Currency:** Your local currency. Stripe usually pays you only in your local currency. Stripe charges a 2% currency conversion fee if your Payout Currency is different from your Presentment Currency. :(

### Highest Stripe Charge Countries.

Assuming your presentment and payout currencies are the same, top-3 countries with highest Stripe charges are ...&#x20;

1. Mexico (7.10%)
2. Hong Kong (6.25%)
3. Malaysia (5.90%)

### Lowest Stripe Charge Countries

Again, assuming your presentment and payout currencies are the same, European countries have the lowest Stripe charges (2.15% and 3.65% for local and international cards respectively).

Within EU, Norway has the highest Stripe charges (4.90% and 5.40% for local and international cards respectively).

{% hint style="success" %}

#### Also Read: [Enemy At The (Billing) Gates](https://docs.sendwithses.com/random-stuff/enemy-at-the-billing-gates).&#x20;

{% endhint %}

#### NOTE: Please write to hello\[at]sendwithses.com if you find a mistake in any calculations.

{% hint style="success" %}

#### Discuss this article on HN: <https://news.ycombinator.com/item?id=22012281>

{% endhint %}


# Startup VS Restaurant

Let's say you want to start your own restaurant. What are the first few things that cross your mind? Think and jot down a few points before you scroll down.&#x20;

.

&#x20;.

&#x20;.

&#x20;.

&#x20;.

I'm sure many of the following points have crossed your mind ...

* How much is it going to cost me.&#x20;
* What's my menu.&#x20;
* How is my menu different from the competition.&#x20;
* What are my prices.&#x20;
* How many customers can i serve every day.&#x20;
* How many customers do i need to serve everyday to break even.&#x20;
* How do i attract footfalls.&#x20;
* What's my brand going to be.&#x20;
* What's the look and feel of my restaurant.&#x20;
* I'm going to lose a lot of money if it doesn't do well.&#x20;
* What am i going to do if it fails.

### Great. Let's move on.

Now let's say you want to launch your own tech startup. What are the first few things that cross your mind? List them down.

.

.

.

.

Well, you must have thought of similar questions but related to your tech startup type. However they are not with the same grit, determination, and attention to profitability as when you were thinking about starting the restaurant. In all probability, your first thoughts must have been, "How do i launch fast and raise some money."&#x20;

Compare both of your thought processes - The Restaurant, and The Tech Startup.

Why are they so different?

Here's why.&#x20;

**RESTAURANT:** With a restaurant you tune your mind from day-one that you have to be profitable to survive. And to be profitable, you have to work on bettering your product day-in-day-out. If you don't do that the losses are immediate and you die almost instantly. It keeps you on your toes. It makes you lean and attentive. You take no bullshit - because the consequences are immediate. You know you will not be able to raise outside investment, except from maybe friends and family. You feel more responsibility to this kind of money than regular VC money. You know very well that a restaurant isn't going to make you a millionaire, let alone a billionaire. You're unconcerned with that thought. In other words your expectations are grounded.

**STARTUP:** The current thought process about tech startups is about two things. First is that founders are fixed that raising outside money is a '*rite of passage*' that they NEED to be successful. Even if you are a '*just-about-decent*' startup you will be able to raise some outside money. This kicks in the second thing - the investor wants you to become big, REALLY BIG, UNICORN BIG. He makes his dreams your goal. This in turn kicks in the need to raise more money. Once you raise money you will only survive by raising more money. Now it's all about finding bigger fools. The cycle goes on till someone calls it a day. This process rarely guarantees success. Because it is not a true goal.

**IN EFFECT**, with a restaurant, if you do not pay attention to day-to-day profitability, you die almost instantly. With a tech startup, there is no such immediate death. This makes you more relaxed about profitability. This is ***THE*** mistake.&#x20;

I guess you get the drift of this article. The takeaway is, "***Whatever business you want to start, think of it like starting a restaurant.***"

Here are some pointers that will work.

1. First, don't call yourself a 'Startup'. The very name induces a wrong thinking pattern. Call yourself a 'Company'.
2. Don't ever think of raising outside money till you are profitable.
3. Don't aim to be a unicorn. YOU NEVER WILL BE. Always aim to build a company that will make you your basic living expenses to start with. Having a small but reliable source of income that meets your monthly bills will make you a strong negotiator in case you have to deal with investors. Imagine a situation where you are negotiating with an investor and in the back of your mind you have those monthly bills weighing you down. You will most likely accept a shitty valuation because you just want to get rid of monthly bills.
4. It is better to own 100% of your company that makes you a decent living than 20% of an unprofitable company that is valued at one billion. Valuations are like Chinese Lanterns. They look awesome and rise high. But invariably they burn out and fall to the earth. Owning 100% of your company gives you more than just money. It gives you FREEDOM. You will be the master of your time.
5. The best time to launch your company is when you are still in college. Because you don't have the financial burden of an adult with a job. Look at college as a sunk cost where you have already paid for food and lodge. Once out of college you will be burdened with a job because you need regular income to pay off that student debt. Also you may not recognize it but college is the 'only' time when you have loads of 'spare time'.
6. And finally, work towards things that make you the master of your time. This is true FREEDOM. This is SUCCESS.


# Getting Started

{% hint style="danger" %}

## This section is outdated: Go here instead: <https://docs.sendwithses.com/getting-started>

{% endhint %}

## 30 minutes ... To start sending Emails & SMS using Send With SES. &#x20;

<table data-header-hidden><thead><tr><th width="150" align="center"></th><th width="260">WHAT</th><th>WHERE</th><th align="center">APPROX TIME</th><th align="center">HOW</th></tr></thead><tbody><tr><td align="center"></td><td>WHAT</td><td>WHERE</td><td align="center">APPROX TIME</td><td align="center">HOW</td></tr><tr><td align="center">1</td><td>Create AWS Account</td><td>AWS Management Console</td><td align="center">10 Mins</td><td align="center"><a href="https://docs.sendwithses.com/how/aws-setups/how-to-create-a-free-aws-account">Help</a></td></tr><tr><td align="center">2</td><td>Create AWS Role</td><td>AWS Management Console</td><td align="center">5 Mins</td><td align="center"><a href="https://docs.sendwithses.com/how/aws-setups/create-aws-role">Help</a></td></tr><tr><td align="center">3</td><td>Move out of SES Sandbox</td><td>AWS Management Console</td><td align="center">5 Mins</td><td align="center"><a href="https://docs.sendwithses.com/how/send-email/how-to-increase-aws-ses-sending-limits">Help</a></td></tr><tr><td align="center">4</td><td>Add DNS Records for your domain</td><td>Your Domain Registrar</td><td align="center">5 Mins</td><td align="center"><a href="https://docs.sendwithses.com/how/send-email/how-to-add-edit-dns-records-with-your-domain-registrar">Help</a></td></tr><tr><td align="center">5</td><td>Move out of SMS Sandbox</td><td>AWS Support Console</td><td align="center">5 Mins</td><td align="center"><a href="https://docs.sendwithses.com/how/send-sms/increase-amazon-sns-sms-spending-limit">Help</a></td></tr><tr><td align="center">6</td><td>SMS - Request Sender ID (Optional)</td><td>AWS Support Console</td><td align="center">5 Mins</td><td align="center"><a href="https://docs.aws.amazon.com/en_pv/pinpoint/latest/userguide/channels-sms-awssupport-sender-id.html">Help</a></td></tr></tbody></table>

**Don't have a domain yet?** We recommend you get it from one of these registrars ... [Google Domains](https://domains.google.com/) or [Namecheap.com](https://www.namecheap.com/) or [Name.com](https://www.name.com/) or [iwantmyname.com](https://iwantmyname.com/).


# AWS Setups


# Create Free AWS Account.

Note: AWS will ask you for your credit/debit card when creating an account. However you will not be billed until you exceed the (generous) free tier.

{% hint style="success" %}

### It is highly recommended you create a separate AWS Account exclusively for Send With SES.&#x20;

{% endhint %}

1. Go to <https://aws.amazon.com/resources/create-account/> and click ‘Sign Up Now’.

![](https://1895149818-files.gitbook.io/~/files/v0/b/gitbook-legacy-files/o/assets%2F-LUFI_-_gHZ4pIVzoRlq%2F-LUdBfYtWEgLbulS4SIv%2F-LUdD10ucf3VOMWyWg5s%2F1%20AWS%20Create%20Account.png?alt=media\&token=27ba2496-1c41-42bc-9ab9-0d43833349ef)

2\. Fill in below details and click ‘Continue’.

![](https://1895149818-files.gitbook.io/~/files/v0/b/gitbook-legacy-files/o/assets%2F-LUFI_-_gHZ4pIVzoRlq%2F-LUdBfYtWEgLbulS4SIv%2F-LUdD4qJH_cAPWycYRE_%2F2%20AWS%20Console%20%20%20Signup%20\(1\).png?alt=media\&token=a0d79da1-7ea8-4b75-849b-d88a2bdd2986)

3\. More details … :). Make sure to give your correct mobile number. This will be used to give you a verification call or send OTP.

![](https://1895149818-files.gitbook.io/~/files/v0/b/gitbook-legacy-files/o/assets%2F-LUFI_-_gHZ4pIVzoRlq%2F-LUdDFW5CI-f5UAQP1UE%2F-LUdDNRWXqvjuZsFK0Jg%2F3%20AWS%20Console%20%20%20Signup%20\(2\).png?alt=media\&token=13820650-d63c-402a-94e6-746273642537)

4\. Enter your credit/debit card details. To verify your card AWS will bill you a small token amount which will be refunded. Other than this you will not be billed anything unless you exceed the (generous) free tier.
![](https://cdn-images-1.medium.com/max/1600/1*eX7TCgs6lBZpCygXx81QSQ.png)

5\. Phone Verification. Enter your country code, mobile number, captcha, and click ‘Call Me Now’ or 'Send OTP' (if available).

![](https://1895149818-files.gitbook.io/~/files/v0/b/gitbook-legacy-files/o/assets%2F-LUFI_-_gHZ4pIVzoRlq%2F-LUdDFW5CI-f5UAQP1UE%2F-LUdDoWUZsj2bYkbhuq4%2F5%20AWS%20Console%20%20%20Signup%20%204%20.png?alt=media\&token=21ac5bbf-c595-43cc-8877-96eb66fb34ef)

If you chose 'Call Me Now', a popup with a number code will be displayed. You will receive a call from AWS and you will be prompted to enter this code.
![](https://cdn-images-1.medium.com/max/1600/1*e0nVRFczYEHEojbqy28mWA.png)

Success. Your identity is verified.

![](https://cdn-images-1.medium.com/max/1600/1*tQ9vBqLqsKdyOxlKBoVMJA.png)

6\. You may be asked to select a ‘Support Plan’. Choose ‘Free’.
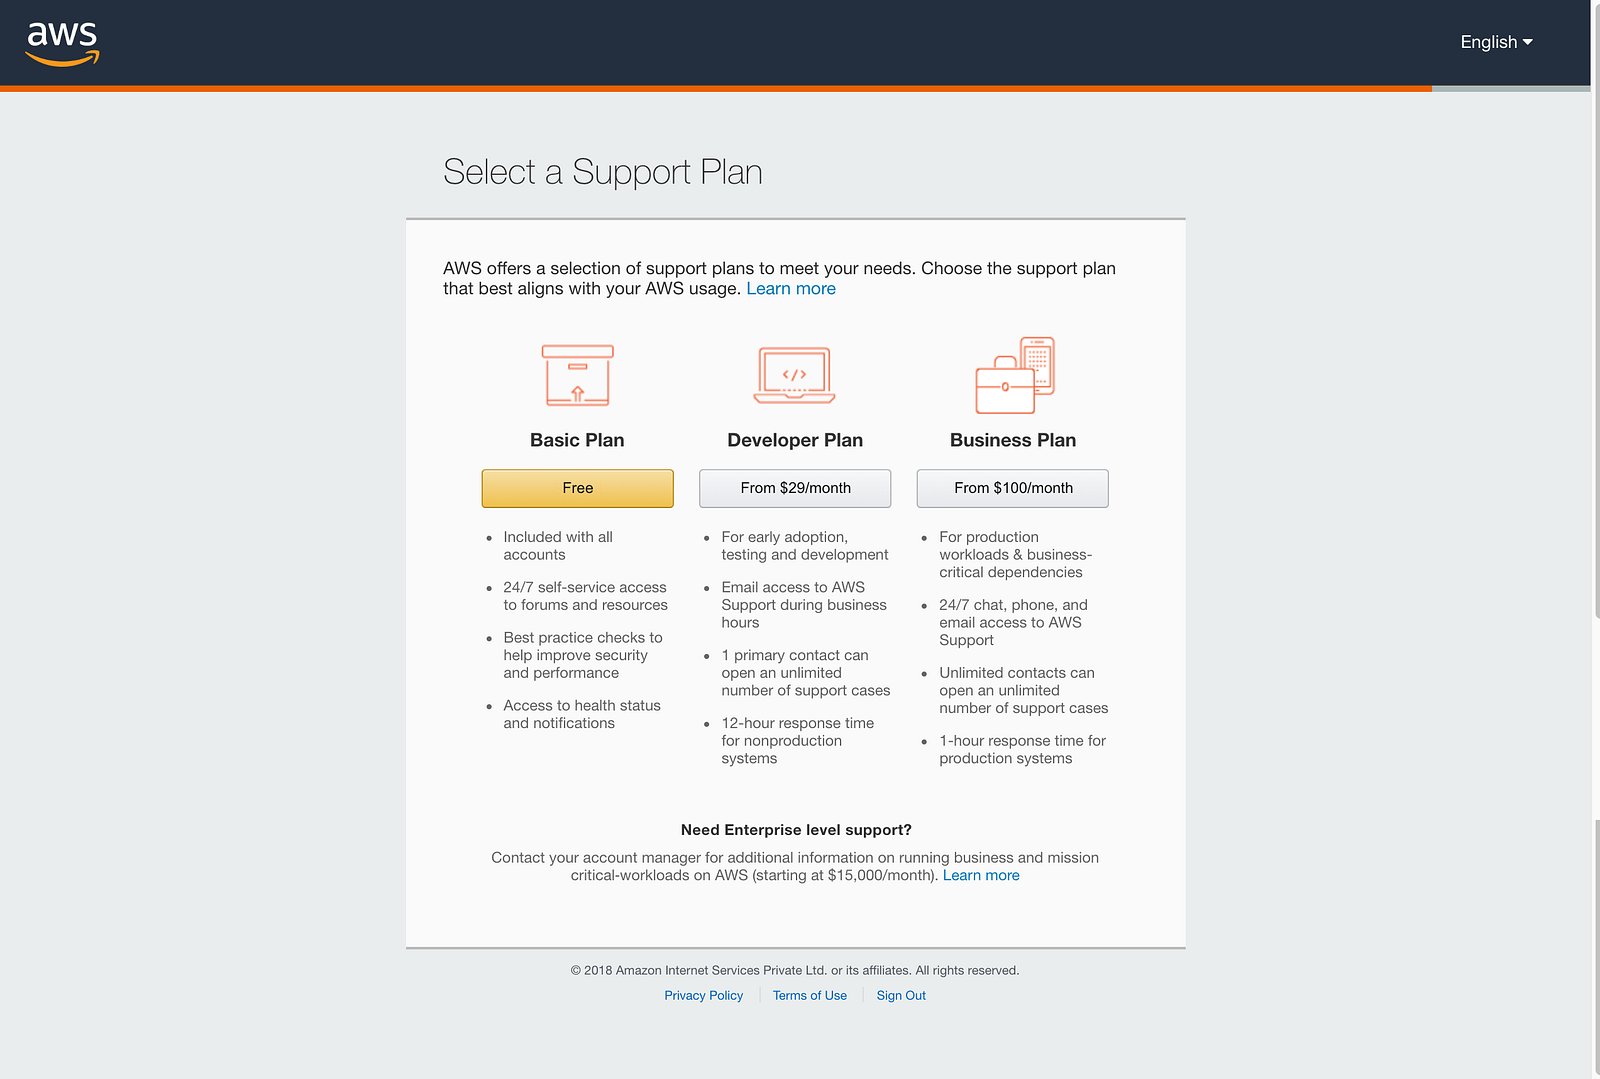
![](https://cdn-images-1.medium.com/max/1600/1*41EjObKGrzbX0olSWPjRUg.png)

7\. **CONGRATS**. You have created your AWS account. Check out the generous ‘Free Tier Details’ here: <https://aws.amazon.com/free/>.

![](https://cdn-images-1.medium.com/max/1600/1*aeWsVQv-k4c1GZowBHDBNQ.png)

> **Need help? Write to <hello@sendwithses.com>**


# Create AWS Role

{% hint style="danger" %}

## This section is outdated: Go here instead: <https://docs.sendwithses.com/getting-started>

{% endhint %}

{% hint style="danger" %}

### It is highly recommended you create a separate AWS Account exclusively for Send With SES.&#x20;

### If you do not have an AWS Account you can create one for free. Follow **this link ‘**[**How to create a free AWS account**](https://docs.sendwithses.com/how/aws-setups/how-to-create-a-free-aws-account)**’.**

{% endhint %}

Once you have an AWS Account you need to create an '**IAM Full Access Role'** for **Send With SES**. **Send With SES** will use this '**IAM** **Role'** to provision various resources (SES, SQS, SNS, S3, Pinpoint, CloudWatch, etc.) within your AWS Account for sending Emails, SMS, Push Notifications, and for collecting message delivery statistics.&#x20;

Follow the instructions below to create the **IAM Role**.

### 1.    Login to your AWS Console at <https://console.aws.amazon.com> and go to IAM.

![](https://1895149818-files.gitbook.io/~/files/v0/b/gitbook-legacy-files/o/assets%2F-LUFI_-_gHZ4pIVzoRlq%2F-Lrrd-GEmAtGp2L2-HL8%2F-LrrhqG2q36spCs2cvr0%2F1.png?alt=media\&token=40bdf090-18a5-4795-9024-fa334bdb9293)

### 2.&#x20;

![](https://1895149818-files.gitbook.io/~/files/v0/b/gitbook-legacy-files/o/assets%2F-LUFI_-_gHZ4pIVzoRlq%2F-Lrrd-GEmAtGp2L2-HL8%2F-LrribLBAIa8uoDUP3ts%2F2.png?alt=media\&token=438b5105-87fb-4b95-8601-c1715a04005f)

### 3.

![IMPORTANT: Account ID must be 033267325636](https://1895149818-files.gitbook.io/~/files/v0/b/gitbook-legacy-files/o/assets%2F-LUFI_-_gHZ4pIVzoRlq%2F-Lrs6dTQnUhpbqlon6YZ%2F-Lrs6fbudtp_A57q_w3z%2F3.2.png?alt=media\&token=e44de877-50c2-451e-901d-9c4c3fd20387)

### 4.

![Why IAM Full Access? Go to end of this article.](https://1895149818-files.gitbook.io/~/files/v0/b/gitbook-legacy-files/o/assets%2F-LUFI_-_gHZ4pIVzoRlq%2F-Lrrd-GEmAtGp2L2-HL8%2F-Lrriv3_mBT6ZwvbVdPP%2F4.png?alt=media\&token=16dbc6d2-e92c-400d-81ab-0346a93cb05b)

### 5.

![](https://1895149818-files.gitbook.io/~/files/v0/b/gitbook-legacy-files/o/assets%2F-LUFI_-_gHZ4pIVzoRlq%2F-Lrrd-GEmAtGp2L2-HL8%2F-LrrjGNcosvyKef3tVCc%2F5.png?alt=media\&token=969a6f02-5ad6-4bb6-a79c-944f505ed21e)

### 6.

![](https://1895149818-files.gitbook.io/~/files/v0/b/gitbook-legacy-files/o/assets%2F-LUFI_-_gHZ4pIVzoRlq%2F-Lrrd-GEmAtGp2L2-HL8%2F-LrrjKnuH0HPKYZWv32W%2F6.png?alt=media\&token=44339386-0efe-48e2-ad2a-9ab2fc47da2d)

### 7.

![](https://1895149818-files.gitbook.io/~/files/v0/b/gitbook-legacy-files/o/assets%2F-LUFI_-_gHZ4pIVzoRlq%2F-Lrrd-GEmAtGp2L2-HL8%2F-LrrjP3gqBDoEuOtjAZ0%2F7.png?alt=media\&token=7bdd2734-463a-4ba4-a62d-00cdc4a45352)

### 8.

![](https://1895149818-files.gitbook.io/~/files/v0/b/gitbook-legacy-files/o/assets%2F-LUFI_-_gHZ4pIVzoRlq%2F-Lrrd-GEmAtGp2L2-HL8%2F-LrrjUZQMkbYMWdQ8mF0%2F8.png?alt=media\&token=b60c4411-b716-4da8-9145-6e2a5b6a9f76)

### 9. Copy paste the ARN Role in Send With SES Settings

![](https://1895149818-files.gitbook.io/~/files/v0/b/gitbook-legacy-files/o/assets%2F-LUFI_-_gHZ4pIVzoRlq%2F-LtdprNQkgguMtDMD2I_%2F-LtdrKDavzRE883j76Lh%2FCopy%20Paste%20ARN%20Role.png?alt=media\&token=f28c7839-7054-4bfc-a162-f9215aaf39af)

{% hint style="danger" %}

### **MUST READ: Why we ask for "IAM Full Access" Role ?**

**IAM Full Access** is something similar to full **Admin Access**. It gives Send With SES the power to provision any  resource within your AWS Account. However Send With SES only provisions resources which are required to send Emails, SMS, and Push Notifications, and to collect various delivery statistics. Currently these resources are - SES, SQS, SNS, S3, Pinpoint, CloudWatch. Send With SES will inform you in advance if any new resource is to be provisioned.&#x20;

The alternative to IAM Full Access Role is to create a 'User' with specific permissions for each of the required AWS Resource and give Send With SES the 'secret keys' for that user (a risky proposition). You will also need create a 'SNS Role' for collecting CloudWatch metrics and give Send With SES that Role ARN. In future if any new permission is required you will need to edit that User/Role. All this can be confusing and cumbersome to most users. The IAM Full Access Role allows Send With SES to securely and programmatically handle all these tasks for you.

### Your AWS Account Security.

Send With SES accesses your AWS Account by requesting a set of temporary keys using the 'IAM Role' provided by you. ***No third parties can access your account.***&#x20;

You can delete the IAM Role at any time to prevent Send With SES from accessing your AWS Account.&#x20;

### It is highly recommended you create a separate AWS Account exclusively for Send With SES. This way you can be sure that any resource launched within this AWS Account has been provisioned by Send With SES.

{% endhint %}

### **Need help? Write to <hello@sendwithses.com>**


# Generate AWS Keys.

DEPRECATED.

{% hint style="danger" %}

## IMPORTANT:

**The below section is only for users who have registered before 12-Nov-2019.**&#x20;

#### **New users (who have registered after 12-Nov-2019) will have to create an** [**AWS Role**](https://docs.sendwithses.com/how/aws-setups/create-aws-role) **instead of using AWS Keys.** Go here : <https://docs.sendwithses.com/getting-started>

{% endhint %}

### Login to your AWS Account Management Console (<https://aws.amazon.com/console/>). **If you do not have an account you can create one for free. For instructions see this link ‘**[**How to create a free AWS account**](https://sendwithses.gitbook.io/helpdocs/how/how-to-create-a-free-aws-account)**’.**

{% hint style="info" %}

### IMPORTANT: You will need to attach 4 policies (**SES, SNS, SQS, and, S3**) and then generate your AWS Keys. Follow Video or Text instructions given below.

{% endhint %}

### Video Instructions:

{% embed url="<https://youtu.be/oAMbuaigwfE>" %}

### Text Instructions:&#x20;

### 1

![](https://1895149818-files.gitbook.io/~/files/v0/b/gitbook-legacy-files/o/assets%2F-LUFI_-_gHZ4pIVzoRlq%2F-LjpG-TOUO-5ovVEz0O7%2F-LjpGOxAmQUl5uH66XdC%2F1.png?alt=media\&token=132a3969-6a38-4423-8036-11c58c241b9c)

### 2

![](https://1895149818-files.gitbook.io/~/files/v0/b/gitbook-legacy-files/o/assets%2F-LUFI_-_gHZ4pIVzoRlq%2F-Lo5JLx3I5A1yYoFGwH5%2F-Lo5JO_ivbVtkor5U4V4%2F2_.png?alt=media\&token=cc042216-492e-4e85-b3ca-66bca0fb11aa)

### 3

![](https://1895149818-files.gitbook.io/~/files/v0/b/gitbook-legacy-files/o/assets%2F-LUFI_-_gHZ4pIVzoRlq%2F-LjpG-TOUO-5ovVEz0O7%2F-LjpGbxAtTB5eWrdXe5E%2F3.png?alt=media\&token=3e8473a5-ecef-4da5-939b-4f9d701af72e)

### 4

![](https://1895149818-files.gitbook.io/~/files/v0/b/gitbook-legacy-files/o/assets%2F-LUFI_-_gHZ4pIVzoRlq%2F-LjpG-TOUO-5ovVEz0O7%2F-LjpGhjHaNmBB2V3aoON%2F4.png?alt=media\&token=7756505d-4da8-476a-9464-bc2593ac7706)

### 5 Attach SES Policy

![](https://1895149818-files.gitbook.io/~/files/v0/b/gitbook-legacy-files/o/assets%2F-LUFI_-_gHZ4pIVzoRlq%2F-LjpG-TOUO-5ovVEz0O7%2F-LjpGwIJTSZcBd6-bxWG%2F5.png?alt=media\&token=8032f6d0-d5d9-49a2-b168-ae38e01de464)

### 6 Attach SNS Policy

![](https://1895149818-files.gitbook.io/~/files/v0/b/gitbook-legacy-files/o/assets%2F-LUFI_-_gHZ4pIVzoRlq%2F-LjpG-TOUO-5ovVEz0O7%2F-LjpGpWpbcjpw27tH61Y%2F6.png?alt=media\&token=dee42bcb-f2d8-43bf-b3cc-f74f65b8f5c7)

### 7 Attach SQS Policy

![](https://1895149818-files.gitbook.io/~/files/v0/b/gitbook-legacy-files/o/assets%2F-LUFI_-_gHZ4pIVzoRlq%2F-LjpG-TOUO-5ovVEz0O7%2F-LjpH3OBXBZExmBu16R0%2F7.png?alt=media\&token=1b477191-8d75-420d-b125-5ff0e9cff29e)

### 8 Attach S3 Policy

![](https://1895149818-files.gitbook.io/~/files/v0/b/gitbook-legacy-files/o/assets%2F-LUFI_-_gHZ4pIVzoRlq%2F-LjpG-TOUO-5ovVEz0O7%2F-LjpH9bx4pAE2HHrxL1X%2F8.1.png?alt=media\&token=d56fbfb3-5820-485f-ba45-fa65d6defc82)

### 9&#x20;

![](https://1895149818-files.gitbook.io/~/files/v0/b/gitbook-legacy-files/o/assets%2F-LUFI_-_gHZ4pIVzoRlq%2F-LjpG-TOUO-5ovVEz0O7%2F-LjpHGzGf_h5tVOqONXH%2F10.png?alt=media\&token=7d9f3ebc-58af-4ac3-bb3f-0e741d3306d0)

### 10

![](https://1895149818-files.gitbook.io/~/files/v0/b/gitbook-legacy-files/o/assets%2F-LUFI_-_gHZ4pIVzoRlq%2F-LjpG-TOUO-5ovVEz0O7%2F-LjpHP_iYC6NJmIsL_zV%2F11.png?alt=media\&token=c98be62e-7a9c-4b2c-b523-b7a39f634fc7)

### 11

![](https://1895149818-files.gitbook.io/~/files/v0/b/gitbook-legacy-files/o/assets%2F-LUFI_-_gHZ4pIVzoRlq%2F-LjpG-TOUO-5ovVEz0O7%2F-LjpHYYBrcMcVQUiddFy%2F12.png?alt=media\&token=22d2f0c3-8b4a-4a35-b07b-52c3098dc13d)

{% hint style="success" %}

### ----- RE-CHECK ----- Have you attached all 4 policies (**SES, SNS, SQS, and, S3**) ?

#### IF YES, YOU ARE GOOD TO GO: You can copy paste your AWS keys in [**Send With SES**](https://sendwithses.com) to start sending emails.

{% endhint %}

{% hint style="danger" %}
**SECURITY OF YOUR AWS KEYS:**\
Your AWS keys are encrypted both in transit and at rest. At any time, you can delete your keys, generate a new set of keys (using the same process as above) and input your new keys into Send With SES. You will not lose your data.

***It is recommended you periodically rotate your AWS Keys.***&#x20;
{% endhint %}

### **Need help? Write to <hello@sendwithses.com>**


# EMAIL


# Add/Edit DNS Records

{% hint style="danger" %}

## This section is outdated: Go here instead: <https://docs.sendwithses.com/getting-started>

{% endhint %}

Once you add your AWS Keys and Domain in **Send With SES** dashboard, you are presented with a set of DNS records like below. You need to enter these DNS records with your Domain Registrar.&#x20;

![](https://1895149818-files.gitbook.io/~/files/v0/b/gitbook-legacy-files/o/assets%2F-LUFI_-_gHZ4pIVzoRlq%2F-Lm8vCMbwDmP5z6BIH4P%2F-Lm8vPQgsNgw1pegRspl%2FAwesomeScreenshot-www-sendwithses-settings-2019-08-13_1_05.png?alt=media\&token=1d907d18-bd2d-44b6-a2c3-89d284382427)

### Select the appropriate help link below depending on who your Domain Registrar is. Adding/Editing DNS entries is very similar across all registrars.

| Domain Registrar                          | Help Link                                                                                                                                                                                                                                                                                                           |
| ----------------------------------------- | ------------------------------------------------------------------------------------------------------------------------------------------------------------------------------------------------------------------------------------------------------------------------------------------------------------------- |
| **domains.google**                        | [https://support.google.com/domains/answer/3290350?hl=en\&ref\_topic=90183](https://support.google.com/domains/answer/3290350?hl=en\&ref_topic=9018335)                                                                                                                                                             |
| **hover.com**                             | <https://help.hover.com/hc/en-us/articles/217282457-How-to-Edit-DNS-records-A-AAAA-CNAME-MX-TXT-SRV->                                                                                                                                                                                                               |
| **godaddy.com**                           | <https://in.godaddy.com/help/manage-dns-zone-files-680>                                                                                                                                                                                                                                                             |
| **name.com**                              | <https://www.name.com/support/categories/200296808-Domains>                                                                                                                                                                                                                                                         |
| <p><strong>namecheap.com</strong><br></p> | <https://www.namecheap.com/support/knowledgebase/article.aspx/434/2237/how-do-i-set-up-host-records-for-a-domain>                                                                                                                                                                                                   |
| **gandi.net**                             | <https://docs.gandi.net/en/domain_names/common_operations/dns_records.html>                                                                                                                                                                                                                                         |
| **networksolutions.com**                  | <https://customerservice.networksolutions.com/prweb/PRAuth/app/WebKM_/JfLhd8LVz0a16-h3GqsHOCqqFky5N_vd*/!autoThread2?pyActivity=%40baseclass.pzProcessURLInWindow&ContentID=KC-454&pyPreActivity=%40baseclass.KMFetchArticleReferenceFromHelpsite&target=popup&pzHarnessID=HID0F88ED5A95E420703943538CE85A7009>     |
| **cloudflare.com**                        | <https://support.cloudflare.com/hc/en-us/articles/360019093151-Managing-DNS-records-in-Cloudflare>                                                                                                                                                                                                                  |
| **iwantmyname.com**                       | <https://help.iwantmyname.com/customer/en/portal/articles/209029-how-do-i-add-an-a-dns-record->                                                                                                                                                                                                                     |
| **AWS Route 53**                          | <p><a href="https://www.youtube.com/watch?v=HwZ3wNaM69s"><https://www.youtube.com/watch?v=HwZ3wNaM69s></a></p><p>or</p><p><a href="https://docs.aws.amazon.com/Route53/latest/DeveloperGuide/ResourceRecordTypes.html"><https://docs.aws.amazon.com/Route53/latest/DeveloperGuide/ResourceRecordTypes.html></a></p> |
| **squarespace.com**                       | <https://support.squarespace.com/hc/en-us/articles/360002101888>                                                                                                                                                                                                                                                    |

{% hint style="success" %}
**Don't have a domain yet?** We recommend you get it from one of these registrars ... [Google Domains](https://domains.google.com/) or [Namecheap.com](https://www.namecheap.com/) or [Name.com](https://www.name.com/) or [iwantmyname.com](https://iwantmyname.com/).
{% endhint %}

### **Need help? Write to <hello@sendwithses.com>**


# Move Out of SES Sandbox and Increase AWS SES Limits.

Move out of AWS SES Sandbox and increase your sending limits.

As of early 2024, AWS has changed the process to get production access to the Simple Email Service (SES). You are now required to have a domain with DNS records for SPF, DMARC, and DKIM in place before you can raise a ticket asking AWS to move you out of the SES Sandbox. This is a progressive step in controlling spam.

These steps are for everyone who wants to send emails using AWS SES and not just **SENDUNE** (formerly Send With SES) users. [**SENDUNE**](https://sendune.com/) users must first complete the setups in your [settings dashboard](https://app.sendune.com/settings/aws-setup) and directly move to Step 9 below.

Don’t let the steps intimidate you. They look complicated but are quite easy.

1\. Login to your AWS account. Search for ‘SES’ and go to the Simple Email Service dashboard.

<figure><img src="https://miro.medium.com/v2/resize:fit:1400/0*VwHmlD49KIfbbs0r.png" alt="" height="362" width="700"><figcaption></figcaption></figure>

2\. Click the the dropdown at the top-right. Select the AWS region from which you want to send emails.

<figure><img src="https://miro.medium.com/v2/resize:fit:1400/0*lkA9q2g0NkYl5jIf.png" alt="" height="362" width="700"><figcaption></figcaption></figure>

3\. Select ‘**Account dashboard**’ option from the left panel. Then click the ‘**Get set up page**’ button.

<figure><img src="https://miro.medium.com/v2/resize:fit:1400/0*lFsbLTQln1NS0FPr.png" alt="" height="362" width="700"><figcaption></figcaption></figure>

4\. Click ‘**Create identity**’. Identity here refers to an active domain that represents the business on behalf of which the emails will be sent.

<figure><img src="https://miro.medium.com/v2/resize:fit:1400/0*6gkSYFaoDT4tR11P.png" alt="" height="810" width="700"><figcaption></figcaption></figure>

5\. Select the ‘**Domain**’ radio button. Then enter your domain or sub-domain name. Then choose options as shown in the image below. It is recommended you use a sub-domain to send your emails because your main domain might be used for your business email. It is VERY IMPORTANT that the domain you enter here have an active website that showcases the nature of your business.

<figure><img src="https://miro.medium.com/v2/resize:fit:1400/0*lJwbjmDdqNt3BETz.png" alt="" height="866" width="700"><figcaption></figcaption></figure>

6\. You will be presented with 4 DNS Records (3 CNAME + 1 TXT). Enter these DNS records in your domain Registrars dashboard. These DNS records must not be deleted as long as you want to send emails.

<figure><img src="https://miro.medium.com/v2/resize:fit:1400/0*OXKr541SFsPCE62f.png" alt="" height="1081" width="700"><figcaption></figcaption></figure>

7\. AWS automatically checks for these DNS records at regular intervals. Once these records are validated, you will receive a confirmation email. It usually takes a few minutes but occasionally can take up to an hour to validate these records.

<figure><img src="https://miro.medium.com/v2/resize:fit:1400/0*1_fTKrqhW5kuLHyv.png" alt="" height="362" width="700"><figcaption></figcaption></figure>

8\. In case you do not receive the above mail you can go to ‘**Identities**’ section in SES dashboard to check for the verification status of your domain. SES dashboard will display a ‘Verified’ status.

<figure><img src="https://miro.medium.com/v2/resize:fit:1400/0*gUPKyprwaJZeP-CV.png" alt="" height="362" width="700"><figcaption></figcaption></figure>

9\. Click ‘**Get set up**’ from left panel and then click ‘**Request production access**’.

<figure><img src="https://miro.medium.com/v2/resize:fit:1400/0*CvXIEe_kX48PQzMQ.png" alt="" height="362" width="700"><figcaption></figcaption></figure>

10\. Choose the type of emails you want to send, ‘Marketing’ or ‘Transactional’. Enter the same domain that you have entered earlier. Accept terms and submit request. It is VERY IMPORTANT that the domain you enter here have an active website that showcases the nature of your business. AWS might reject your request if you do not have a website or just have a generic landing page.

<figure><img src="https://miro.medium.com/v2/resize:fit:1400/0*XiZ_lc0PUfHC3RAL.png" alt="" height="472" width="700"><figcaption></figcaption></figure>

11\. That’s it. You can sit back and relax. If everything is in order AWS will move your SES account into production and you will be able to send emails. It might take upto a day before AWS grants your request. Occasionally AWS might send you an email asking for more details. Reply with as much detail as possible. You must be able to convince AWS that you are a genuine email sender.

<figure><img src="https://miro.medium.com/v2/resize:fit:1400/0*KmfMgWFpWU2hvXE_.png" alt="" height="362" width="700"><figcaption></figcaption></figure>

12\. You will receive an email once AWS moves your SES account out of the sandbox. You can also click ‘**Account dashboard**’ from the left panel and see your sending limits. For new accounts AWS grants a sending limit of 50,000 emails er day with a sending rate of 14 emails per second.

<figure><img src="https://miro.medium.com/v2/resize:fit:1400/0*Zgr6HdoRcRSagG7l.png" alt="" height="362" width="700"><figcaption></figcaption></figure>

13\. If you need more you can always raise a request to increase your limits.

<figure><img src="https://miro.medium.com/v2/resize:fit:1400/0*uHnhuLXRJ4nWX9DL.png" alt="" height="362" width="700"><figcaption></figcaption></figure>

14\. You can request a raise for your ‘**Sending quota’.**

<figure><img src="https://miro.medium.com/v2/resize:fit:1400/0*L8r1RatSz0BVtekG.png" alt="" height="362" width="700"><figcaption></figcaption></figure>

15\. You can also request a raise for your ‘**Sending rate’**.

<figure><img src="https://miro.medium.com/v2/resize:fit:1400/0*u3h0aqK4PzTnMPzL.png" alt="" height="362" width="700"><figcaption></figcaption></figure>

16\. And finally, keep an eye on your sending reputation. You can find this by clicking ‘**Reputation metrics**’ in the SES dashboard. Make sure your reputation is always ‘Healthy’. AWS will block your account if you send unsolicited emails. These blocks are usually permanent. The block is not only for your AWS account but also for your domain.

<figure><img src="https://miro.medium.com/v2/resize:fit:1400/0*HWWU_eTnnhvbmas-.png" alt="" height="362" width="700"><figcaption></figcaption></figure>

Happy emailing.

{% hint style="danger" %}
**MPORTANT ADVICE:**&#x20;

**Sending thousands of emails immediately after creating your account will trigger 'red-flags' with email service providers (like Gmail, Yahoo, Outlook). They may start to divert your emails to spam folders. Start by sending just a few emails and gradually increase them over a couple of weeks.**
{% endhint %}

{% hint style="danger" %}
**NOTICE:**

**If you send unsolicited emails your account will be banned by AWS.** \
**Send With SES will not be able to help you in this case.**
{% endhint %}

\===================

<mark style="color:red;">**The below section is the older method and is outdated. You can ignore it.**</mark>

\===================

To prevent fraud and abuse AWS puts new accounts in '[Sandbox Mode](https://docs.aws.amazon.com/ses/latest/DeveloperGuide/request-production-access.html)' with certain restrictions. Follow the below steps to get out of the Sandbox and increase your sending limits.

### 1

![](https://1895149818-files.gitbook.io/~/files/v0/b/gitbook-legacy-files/o/assets%2F-LUFI_-_gHZ4pIVzoRlq%2F-LjK_lRAuI_ZG9xY8VjD%2F-LjKbchm_rh_zy2nUG9s%2F1.png?alt=media\&token=204cd88a-fcad-4cb7-9a24-32f1ee35b922)

### 2

![](https://1895149818-files.gitbook.io/~/files/v0/b/gitbook-legacy-files/o/assets%2F-LUFI_-_gHZ4pIVzoRlq%2F-LjK_lRAuI_ZG9xY8VjD%2F-LjKbciQ2PaEfcylu-YT%2F2.png?alt=media\&token=713c58fa-9213-4133-b8dd-66c16c865623)

### 3

![](https://1895149818-files.gitbook.io/~/files/v0/b/gitbook-legacy-files/o/assets%2F-LUFI_-_gHZ4pIVzoRlq%2F-LjoqBNbUf_ELunPFdup%2F-LjoqJCUQYAvNKGgEwM2%2FAwesomeScreenshot-3-2019-07-15-14-07-93.png?alt=media\&token=63993cb6-8269-40dc-b90b-072ace328262)

### 4

![OPTIONAL QUESTIONS: 1.Describe how you will comply with AWS Service Terms  and AUP.   ANSWER: We do not send unsolicited messages. Our emails are in response to user actions in our app.     2. Describe how you will only send to recipients who have specifically requested your mail . ANSWER: We send messages only to our registered users and to those who have subscribed to receive our messages. We also send transactional emails like order and shipping notifications.    3. Describe the process that you will follow when you receive bounce and complaint notifications. ANSWER: We have an unsubscribe link at the bottom of every email. An email that bounces or a user who unsubscribes will never be sent further emails.](https://1895149818-files.gitbook.io/~/files/v0/b/gitbook-legacy-files/o/assets%2F-LUFI_-_gHZ4pIVzoRlq%2F-Lzp_qIhrdu4rTDdd1K0%2F-Lzp_wlEyyJ8ygKhhfdM%2Fses%20limits_tiny.png?alt=media\&token=94db1ced-52f5-4eed-98f2-7f990a6323f8)

### 5

![](https://1895149818-files.gitbook.io/~/files/v0/b/gitbook-legacy-files/o/assets%2F-LUFI_-_gHZ4pIVzoRlq%2F-M-U0Jl-zO1a66CqqRqM%2F-M-U0TkRTBhPN8HKQaIh%2F5.png?alt=media\&token=2e38b0c3-bb82-4a9d-a957-b39fbd3990dc)

### 6

![](https://1895149818-files.gitbook.io/~/files/v0/b/gitbook-legacy-files/o/assets%2F-LUFI_-_gHZ4pIVzoRlq%2F-M-U0Jl-zO1a66CqqRqM%2F-M-U1ZI6E0bGPs-U2gp1%2F6.png?alt=media\&token=c9357d2c-8759-4bd4-b170-8000212392d0)

### 7

![I wish to send transactional and marketing newsletters to my subscribers. Request you to increase my sending limits and rate. Thank you.](https://1895149818-files.gitbook.io/~/files/v0/b/gitbook-legacy-files/o/assets%2F-LUFI_-_gHZ4pIVzoRlq%2F-LjK_lRAuI_ZG9xY8VjD%2F-LjKbcixx7uDTinsnROk%2F7.png?alt=media\&token=8299ea25-0255-4d0b-a7f0-0715ad44c928)

### 8

![](https://1895149818-files.gitbook.io/~/files/v0/b/gitbook-legacy-files/o/assets%2F-LUFI_-_gHZ4pIVzoRlq%2F-LjoqBNbUf_ELunPFdup%2F-LjoqUITEwre_VlO-Xjj%2FAwesomeScreenshot-8-2019-07-15-14-07-20.png?alt=media\&token=0f989222-e352-4652-9168-c99a1371f578)

That’s it. AWS will take a few hours to respond. If AWS needs any extra information they will ask you for the same before increasing your limits.

Do not worry if AWS gives you lesser limits than what you asked for. Just send a few emails, wait a few days and submit another limit increase request.

Over time, depending on your usage and reputation, you can continue asking AWS to increase these limits. They will do so gladly but only if your email sending reputation is good. So make sure you don’t send out any unsolicited emails.

{% hint style="danger" %}
**IMPORTANT ADVICE:**&#x20;

**Sending thousands of emails immediately after creating your account will trigger 'red-flags' with email service providers (like Gmail, Yahoo, Outlook). They may start to divert your emails to spam folders. Start by sending just a few emails and gradually increase them over a couple of weeks.**
{% endhint %}

{% hint style="danger" %}
**NOTICE:**

**If you send unsolicited emails your account will be banned by AWS.** \
**Send With SES will not be able to help you in this case.**
{% endhint %}

Happy email sending.

### **Need help? Write to <hello@sendwithses.com>**


# Email Collection Popup.

{% hint style="warning" %}

#### This section is outdated.

{% endhint %}

![Send With SES - Email Collection Popup - Reference Image](https://1895149818-files.gitbook.io/~/files/v0/b/gitbook-legacy-files/o/assets%2F-LUFI_-_gHZ4pIVzoRlq%2F-LmyCNgqwZnDAhUKfObV%2F-LmyDTw0eGoLP77XQNl_%2Femail%20collection%20popup.png?alt=media\&token=026166a1-80bb-46da-afff-30ecbc9168ed)

## 1. Add Email Collection Popup To Your Website \[Red].

* Login to your **Send With SES** account and go to '[Email Collection Popup](https://sendwithses.com/email-collection-popup)' section.
* Copy the code similar to one shown in red box in above image.
* It is very **IMPORTANT** that you paste this code between the `<body>` and `</body>` tags of your page. If you paste the code outside the `<body>` tags it will prevent your popup from appearing correctly.

#### Example HTML page BEFORE the email collection popup code has been added <a href="#id-8109" id="id-8109"></a>

{% code title="" %}

```
<html>
<head>
This is the head of your page.
<title>Example HTML page</title>
</head>
<body>
This is the body of your page.
</body>
</html>
```

{% endcode %}

#### Example HTML page AFTER the email collection popup code has been added <a href="#id-990d" id="id-990d"></a>

{% code title="" %}

```
<html>
<head>
This is the head of your page
<title>Example HTML page</title>
</head>
<body>
This is the body of your page.
<script src="https://sendwithses.com/users/load-email-collection-popup?unique_id=1234567890">
</script>
</body>
</html>
```

{% endcode %}

The 'Email Collection Popup' shows up at the bottom-right of your website.

![](https://1895149818-files.gitbook.io/~/files/v0/b/gitbook-legacy-files/o/assets%2F-LUFI_-_gHZ4pIVzoRlq%2F-LmyCNgqwZnDAhUKfObV%2F-LmyIqzgMV10gOSUbu1a%2FScreenshot%202019-08-23%2017.19.06.png?alt=media\&token=c4190ec3-40fa-4564-8d2a-c9a57c115359)

## 2. Design Email Collection Popup \[Green].

* Toggle button above 'Email Collection Popup' to enable it. Click anywhere inside and type your desired help text. Highlight any part of the text for rich formatting options.
* By default the Email Collection Popup only has the 'Email Field' enabled. You can include 'Phone Number' and 'Message Box' by selecting toggle buttons in the 'Popup Designer'.&#x20;
* When 'Message Box' is enabled you can optionally forward any messages from end users to your support email. To do so enter your support email in the 'Messages Forward Email' box.
* You can change the background and text colors of the 'Email Collection Popup' to match your website theme.

## 3. Confirmation and Welcome Emails \[Blue].

* When a visitor to your website enters their email, they are first sent a confirmation link (also called as 'Double-Opt-In').
* Once user clicks the confirmation link, their email is automatically inserted into your contacts list.&#x20;
* After the user clicks the confirmation link they can optionally be sent a 'Welcome Email'. You need to enable and compose 'Welcome Email'. See blue box in reference image at top.

### **Need help? Write to <hello@sendwithses.com>**


# Custom HTML

### Custom HTML Editor

Send With SES has a Custom HTML Editor in addition to the inbuilt Email Designer.&#x20;

The inbuilt Email Designer is easy to use and suits a wide variety of email sending needs. The Custom HTML Editor is for those who want a unique email template to suit their corporate branding needs.&#x20;

![](https://1895149818-files.gitbook.io/~/files/v0/b/gitbook-legacy-files/o/assets%2F-LUFI_-_gHZ4pIVzoRlq%2F-Mhlpj4I9eGwuZ4VOINQ%2F-MhlrhsbD_fV5DNfOxbE%2FScreen%20Shot%202021-08-18%20at%2010.19.55%20AM.png?alt=media\&token=3c6e835c-b436-45a2-87e1-676b3f4f1c7e)

You can compose your HTML within the Custom HTML Editor or copy paste HTML content that you have created elsewhere. You can also create a Custom HTML Template which you can trigger via an API call.

### Replace Tags (aka Merge Tags)

Send With SES supports **Replace Tags (aka Merge Tag)**. A REPLACE TAG is indicated by a unique name within **double-curly-braces**, like so ... **{{password-reset-link}}**. You can use as many REPLACE TAGS as needed. When sending email, the content within the double-curly-braces will be replaced by the content you send via your API call. Image below illustrates.

![](https://1895149818-files.gitbook.io/~/files/v0/b/gitbook-legacy-files/o/assets%2F-LUFI_-_gHZ4pIVzoRlq%2F-LYBVcVzQ-Xl80Khl2ps%2F-LYBd5gwC3weKEc2r7HU%2FEMAIL%20VIA%20API.png?alt=media\&token=da25c3cb-2ad8-4512-bdd6-34b851786e2e)

### Name Replace Tag \[\[name]]

Send With SES has a **'one-of-a-kind'** replace tag called **\[\[name]]**. This replaces the **\[\[name]]** in your email template with the **Full Name** associated with your Contact. This allows you to send more personal emails to your users.

{% hint style="info" %}
The Name Replace Tag must **STRICTLY** be lower case **name** in **double square brackets** like below.

### **\[\[name]]**

{% endhint %}

![](https://1895149818-files.gitbook.io/~/files/v0/b/gitbook-legacy-files/o/assets%2F-LUFI_-_gHZ4pIVzoRlq%2F-Mhlssrk_a33agXWYn5q%2F-MhlvvS1OvB9ZUNB8AH8%2Fname%20repalce%20tag.png?alt=media\&token=7d46a2b6-78f0-4600-8275-7ecd95aabb05)

In the above template&#x20;

&#x20;    Hi \[\[name]],

&#x20;    is replaced by

&#x20;    Hi John Doe, (if your contact has a name attached to it)

(or)

&#x20;     Hi,  (if your contact does not have a name attached to it)

{% hint style="warning" %}
**NOTE: Name Replace Tag does not work with 'Test Emails'.**
{% endhint %}

### Custom HTML - One More Way

In additional to the Custom HTML Editor, there is another way send your custom HTML emails. While we do not recommend it, here's how you can do it in case you really need it ...

**1.Create a blank template with just one 'replace tag' {{custom\_html}} like below ...**

![](https://1895149818-files.gitbook.io/~/files/v0/b/gitbook-legacy-files/o/assets%2F-LUFI_-_gHZ4pIVzoRlq%2F-MQejbpCDfUvOgdfjV5A%2F-MQemhi4VCf6X_nfIiL7%2FSEND-WITH-SESCustom%20HTML.png?alt=media\&token=2dd2c016-d997-4e39-8c46-c9eecbfae0d7)

**2. Compose your custom HTML using any HTML editor.**&#x20;

**3. Replace {{custom\_html}} in above template with your custom HTML when triggering an email via the** [**API**](https://docs.sendwithses.com/api/send-email-via-api)**.**&#x20;

{% hint style="danger" %}

#### IMPORTANT: HTML for emails is quite tricky as different email clients render HTML differently. So you need to thoroughly test your HTML content with a tool like Litmus.

{% endhint %}


# SMS

[**Send With SES**](https://www.sendwithses.com) allows you to send SMS messages (text messages) to your customers' mobile devices. Here are some features and links to more information.

1. **Global Coverage:** You can send SMS to recipients in [almost all countries across the world](https://docs.aws.amazon.com/pinpoint/latest/userguide/channels-sms-countries.html).<br>
2. **Message Types:** You can send the following types of SMS messages.
   * *Promotional* – Noncritical messages, such as marketing messages.
   * *Transactional* – Critical messages that support customer transactions, such as one-time passcodes (OTP).<br>
3. An SMS can contain up to [160 GSM characters](https://docs.aws.amazon.com/sns/latest/dg/sms_publish-to-phone.html). If you send a big message, every 160 characters or part thereof is billed as a separate SMS. A single message cannot have than 1600 characters (i.e. 10 SMS's). However it is recommended to keep your SMS as short as possible for reliable delivery.<br>
4. **Sender ID:** This is a name that appears as the message sender on recipients' devices. Sender IDs are a useful way to identify yourself to the recipients of your messages. For countries and regions that support Sender IDs, see [Supported Regions and Countries](https://docs.aws.amazon.com/pinpoint/latest/userguide/channels-sms-countries.html). You need to request AWS to allot a Sender ID to you. More details [here](https://docs.aws.amazon.com/pinpoint/latest/userguide/channels-sms-awssupport-sender-id.html).<br>
5. **SMS Pricing:** AWS SMS pricing is probably the lowest you can get. Pricing varies from country to country. See pricing information [here](https://aws.amazon.com/pinpoint/pricing/#SMS_text_messages).<br>
6. **Monthly Spending Limit:** AWS limits the amount that you can spend to send SMS messages. By default, the limit is set to 1.00 (One) USD per month to prevent abuse or misuse. You can request a spending limit increase through the AWS Support Center. Follow instructions [here](https://docs.sendwithses.com/how/send-sms/increase-amazon-sns-sms-spending-limit).


# Move Out of SMS Sandbox

Move out of SMS Sandbox and increase your sending limits.

{% hint style="warning" %}

#### The requirements for sending SMS have become complicated since early 2021. For any support you can contact us at hello//at//sendwithses.com&#x20;

{% endhint %}

To prevent abuse or misuse, AWS places your account in 'Sandbox Mode' with certain restrictions. To move out of the SMS Sandbox follow the instructions detailed [here](https://docs.aws.amazon.com/pinpoint/latest/userguide/channels-sms-awssupport-sandbox.html).

You can send SMS to almost [all countries](https://docs.aws.amazon.com/pinpoint/latest/userguide/channels-sms-countries.html) across the world. Some countries have additional requirements to send SMS.

* Additional requirements for [sending SMS to USA](https://docs.aws.amazon.com/pinpoint/latest/userguide/settings-10dlc.html).
* Additional requirements for [sending SMS to INDIA](https://docs.aws.amazon.com/pinpoint/latest/userguide/channels-sms-senderid-india.html).

For new accounts the monthly SMS spend limit is restricted to  $1.00 (USD). Estimate your SMS sending cost and increase your monthly SMS spending quota by following instructions [here](https://docs.aws.amazon.com/pinpoint/latest/userguide/channels-sms-awssupport-spend-threshold.html).

Once AWS grants you your SMS spending limit increase, you will need to input that value in Send With SES (see below image).

![](https://1895149818-files.gitbook.io/~/files/v0/b/gitbook-legacy-files/o/assets%2F-LUFI_-_gHZ4pIVzoRlq%2F-M0aIiJhzPtSnpPUHCnX%2F-M0acDCmgNxp36O8DYbP%2F6%20SMS.png?alt=media\&token=e5370138-91cb-44ff-98a6-554a679178db)

\
*- - - IGNORE BELOW DOCUMENTATION - - -*\
*- - - IGNORE BELOW DOCUMENTATION - - -*

### Before requesting spending limit increase, you need to roughly estimate how many SMS's you wish to send per month.&#x20;

For example, let's say most of your users are in India where SMS costs US$ 0.00223 per message. You estimate you need to send about 50,000 SMS per month. This will cost you US$ 111.5.&#x20;

$$
0.00223  X  50,000 = 111.5
$$

So you might want to request a slightly higher spending limit, say US$ 200.

### Login to your AWS Account and go to [Support Center](https://console.aws.amazon.com/support/home). Follow the instructions in images below to request a spending limit increase for SMS messages.

### 1.

![](https://1895149818-files.gitbook.io/~/files/v0/b/gitbook-legacy-files/o/assets%2F-LUFI_-_gHZ4pIVzoRlq%2F-M0aIiJhzPtSnpPUHCnX%2F-M0aab7SQubi0anHD07h%2F1%20SMS%20open%20case.png?alt=media\&token=201793bd-e92e-40da-a47e-a0bdb5cc067e)

### 2

![](https://1895149818-files.gitbook.io/~/files/v0/b/gitbook-legacy-files/o/assets%2F-LUFI_-_gHZ4pIVzoRlq%2F-M0aIiJhzPtSnpPUHCnX%2F-M0aasJajKiC9nIZBSIX%2F2%20SMS.png?alt=media\&token=878037ab-8b96-4f7d-97a9-0ae640942d11)

### 3

![](https://1895149818-files.gitbook.io/~/files/v0/b/gitbook-legacy-files/o/assets%2F-LUFI_-_gHZ4pIVzoRlq%2F-M0aIiJhzPtSnpPUHCnX%2F-M0ab2D1BFJ7N1GdvH6r%2F3%20SMS.png?alt=media\&token=23c8590b-ee21-4552-b266-2b4fb8a46170)

### 4

![](https://1895149818-files.gitbook.io/~/files/v0/b/gitbook-legacy-files/o/assets%2F-LUFI_-_gHZ4pIVzoRlq%2F-M0aIiJhzPtSnpPUHCnX%2F-M0ab8tm_EgBBp6QhSDY%2F4%20SMS.png?alt=media\&token=d5a221c8-bf9c-479b-9dc1-ca6f0848af08)

### 5

![](https://1895149818-files.gitbook.io/~/files/v0/b/gitbook-legacy-files/o/assets%2F-LUFI_-_gHZ4pIVzoRlq%2F-M0aIiJhzPtSnpPUHCnX%2F-M0abLZmUBXoBcMn2F2T%2F5%20SMS.png?alt=media\&token=b9fc1cb6-d730-4bb5-bc73-fe1dca08d506)

That’s it. AWS will take a few hours to respond. If AWS needs any extra information they will ask you for the same before increasing your spending limit.

Do not worry if AWS gives you a lesser limit than what you asked for. Just send a few SMS, wait for a few days and submit another limit increase request.

Over time, depending on your usage and reputation, you can continue asking AWS to increase these limits. They will do so gladly but only if your sending reputation is good. So make sure you don’t send out any spammy SMS's.

### 6. One Final STEP

Once AWS grants you your SMS spending limit increase, you will need to input that value in Send With SES (see below image).

![](https://1895149818-files.gitbook.io/~/files/v0/b/gitbook-legacy-files/o/assets%2F-LUFI_-_gHZ4pIVzoRlq%2F-M0aIiJhzPtSnpPUHCnX%2F-M0acDCmgNxp36O8DYbP%2F6%20SMS.png?alt=media\&token=e5370138-91cb-44ff-98a6-554a679178db)

{% hint style="danger" %}
**NOTICE:**

**If you send unsolicited SMS your account will be banned by AWS.** \
**Send With SES will not be able to help you in this case.**
{% endhint %}

Happy SMS'ing.

### **Need help? Write to <hello@sendwithses.com>**


# OTP SMS

Using OTP's (One Time Passwords) for Sign-up, Sign-in, and 2FA (Two Factor Authentication) has become quite mainstream. You know how it works. You send a code to the mobile number of your end user. They enter that code in your app. You verify whether it is the correct code and let the user sign-in or sign-up or do whatever.

The whole process involves a few steps in case you wish to roll it on your own. It's not very complicated, but you still need to wrangle some code.

1. **Random Code Generator:** A small script that generates a random 'time bound one time password (OTP)'.
2. **Send Script:** To trigger an OTP SMS based on user input. (Pro Tip: The OTP SMS needs to be delivered on the 'Transactional Route')
3. **Verify Script:** When a user sends you back the OTP, you need to verify it's correctness and expiry time bound (say 5 minutes).
4. **Database:** A DB table where you store the OTP sent along with the timestamp for later verification.
5. **Rate Limiting:** So that a rouge agent does not request too many SMS's that shoot up your bill.   &#x20;

### Happy and time saving news for you!&#x20;

The SMS module in Send With SES now comes with a '**OTP SMS Template'** to handle all the above for you. You edit the template to suit your requirement ...&#x20;

![](https://1895149818-files.gitbook.io/~/files/v0/b/gitbook-x-prod.appspot.com/o/spaces%2F-LUFI_-_gHZ4pIVzoRlq%2Fuploads%2FQLD4N7GqimvrV7eu2ady%2FScreen%20Shot%202021-11-03%20at%2012.13.14%20PM.png?alt=media\&token=1cb74bd9-2bb9-4028-accd-be5023f80401)

... and then trigger the ***Send API*** ...&#x20;

```
// Send API
{
      "method": "POST",
      "url": "https://api.sendwithses.com/send-otp",
      "headers": {"template-key": "a2aa10a6S7SDRBzRODj09OkeXelA2"},
      "body": {
          "sender_id": "ABCDEF"
          "origination_number": "+449876543212"
          "mobile": "+449876543210",
       }
}
```

... followed by the ***Verify API***.

```
// Verify API
{
      "method": "POST",
      "url": "https://api.sendwithses.com/verify-otp",
      "headers": {"template-key": "a2aa10a6S7SDRBzRODj09OkeXelA2"},
      "body": {
          "mobile": "+449876543210"
          "otp": "123456",
       }
}
```

### Every SMS is transparently tracked along with the cost.

![](https://1895149818-files.gitbook.io/~/files/v0/b/gitbook-x-prod.appspot.com/o/spaces%2F-LUFI_-_gHZ4pIVzoRlq%2Fuploads%2FplmMMrT2QdqeWMnBh2s1%2FSEND_WITH_SES.png?alt=media\&token=5147f695-b748-4ed0-8b79-b0894085fa4f)

### No Extra Charges.

Starting 1-Nov-2021, this feature has been enabled for all users. There are no extra charges for using the OTP SMS feature. You only pay the [SMS cost](https://aws.amazon.com/sns/sms-pricing/) that is charged directly by AWS to you.

#### Don't have a Send With SES account? You can [signup for the free plan](https://www.sendwithses.com).


# Push Notifications

Launching Q2-2023

Launching Q2-2023